This is part 1 of an in-depth guide for Songbird Editor. It covers setting up the project for creating your first game and updating from older builds.
- Installation
Songbird requires at least a basic installation of Unity (personal edition available for free on https://unity.com). There is no need for any additional modules or programming software for the system to function and so it can be skipped during installation. Recommended release is 2022.1.18f or newer. The general process of installing Unity won't be explained in this guide, but there are many outside resources for that online. The guide will proceed assuming the user is using Unity Hub to manage the core Unity engine.
Note: If you've never used Unity and are downloading it for the first time you will be informed about Unity's license. As a fresh user you do not need to worry about it as Unity is fully free for both commercial and non-commercial use as long as you don't make more than 100.000$ a year from it.
Once Unity has been installed a new project needs to be started. Recommended template for new projects is 2D Core.
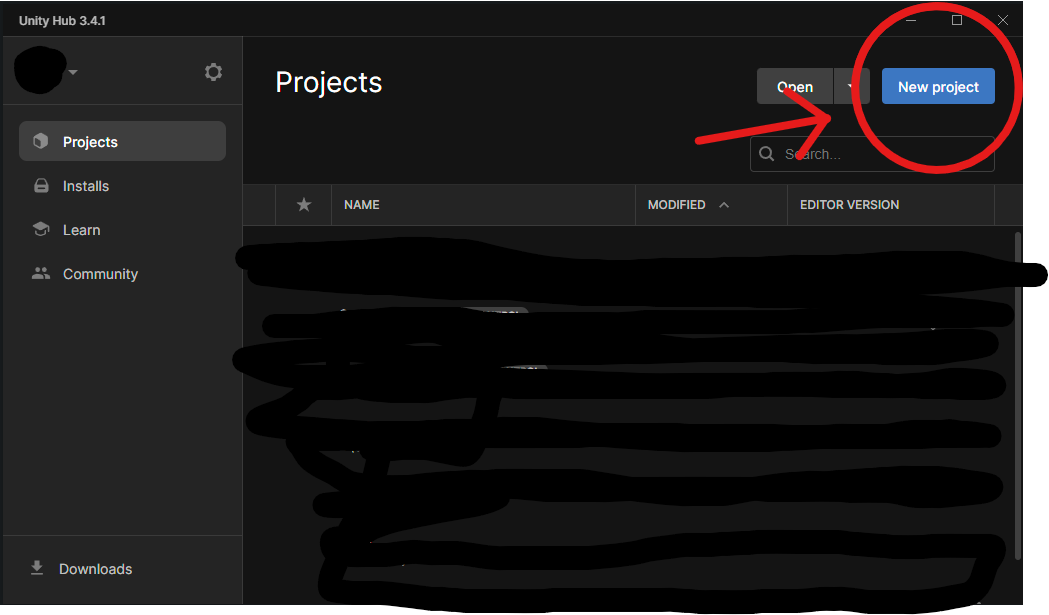
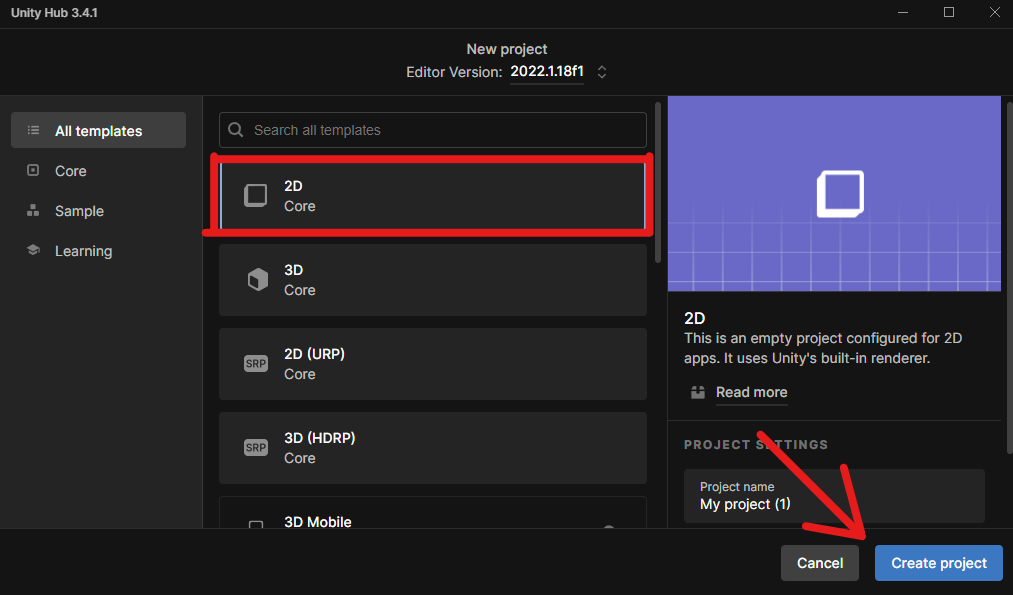
Once the project is created it will take a minute for it to launch and assemble all it's default packages. Once it's done a standard Unity window will pop up:
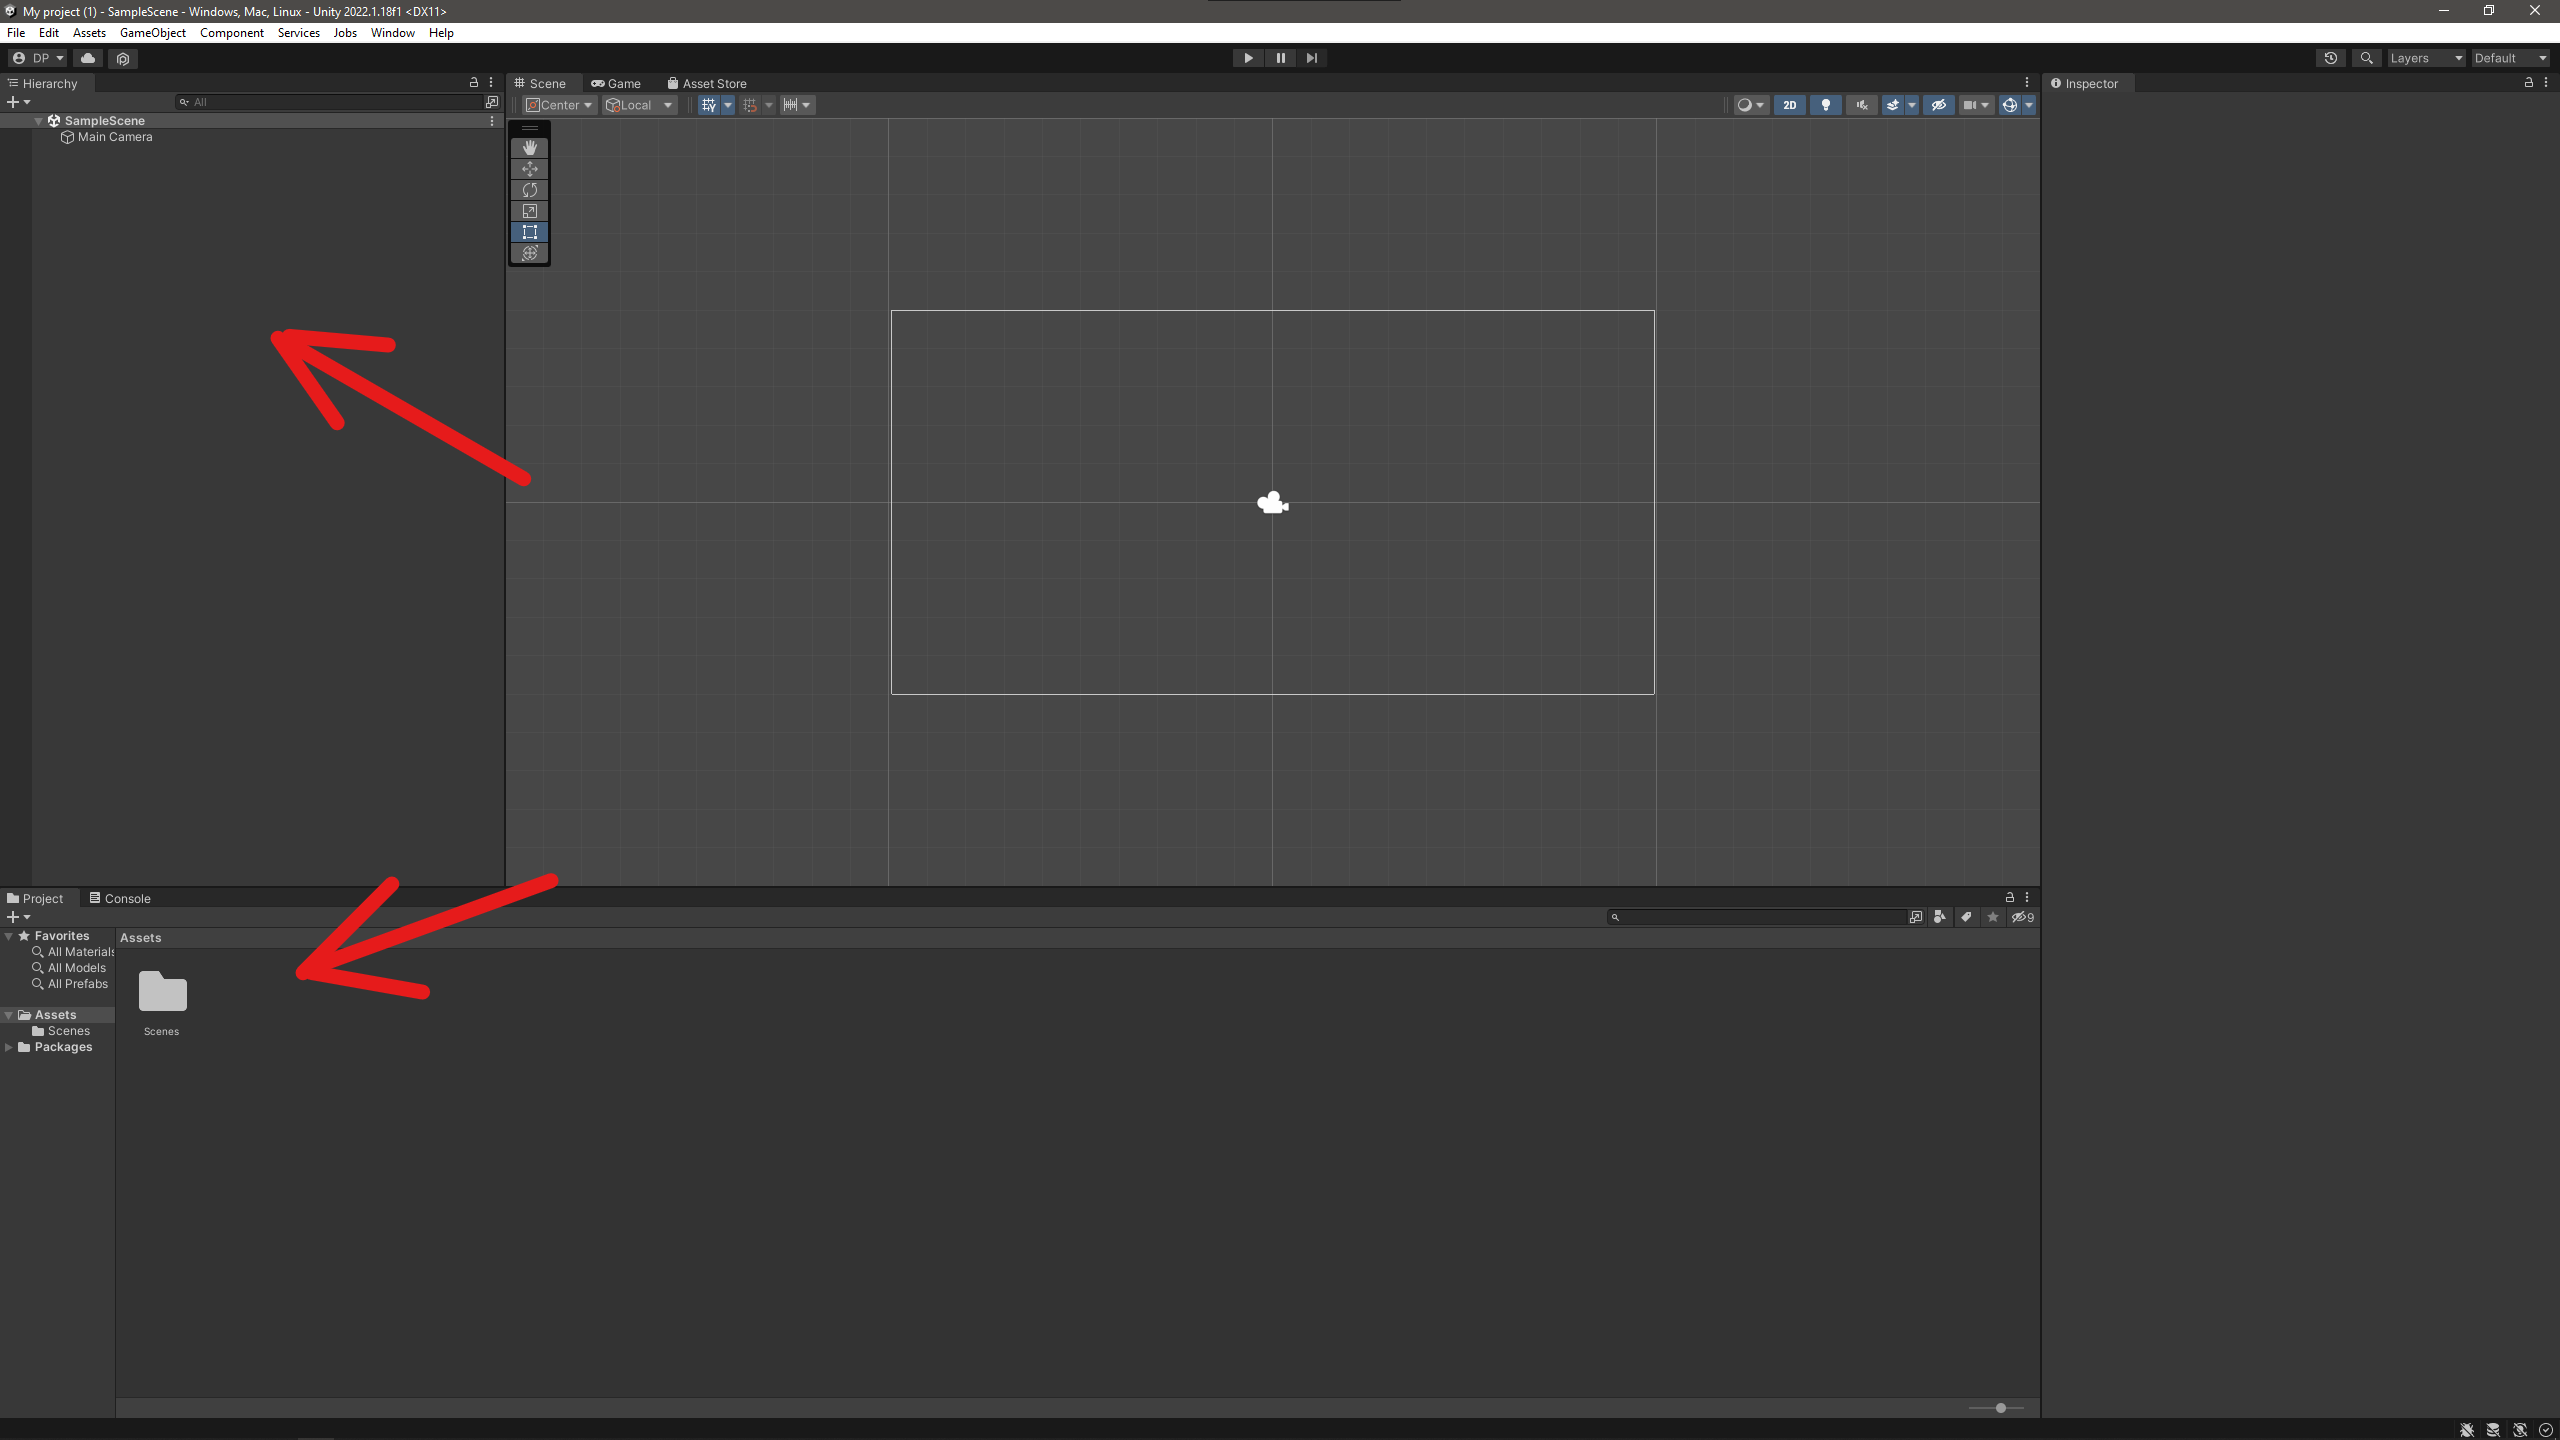
Depending on which template was used Unity might add additional files to either Hierarchy or Project tabs (marked in the image above). If that does happen you will need to delete everything from Hierarchy and can also delete the files in project to save space. They won't be necessary for Songbird to operate.
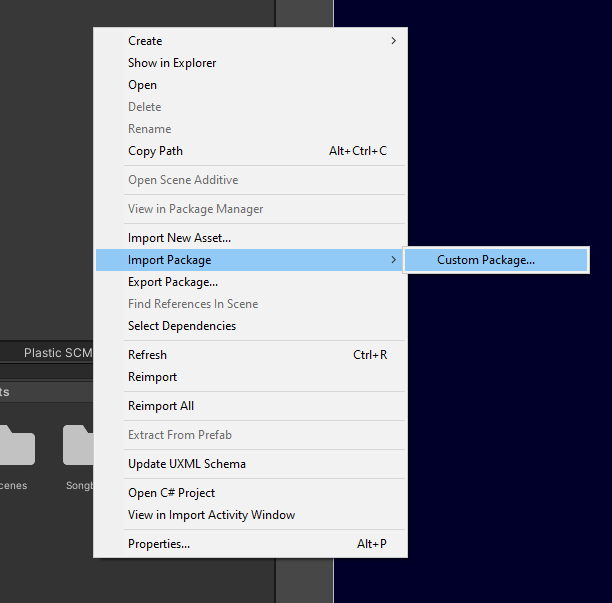
Once a project is created Songbird can be imported. To do this open the asset menu by either selecting it on the top bar of your Unity window or right click inside your project tab (in default layout this tab is in the bottom left corner), then navigating to Import Package->Custom Package.
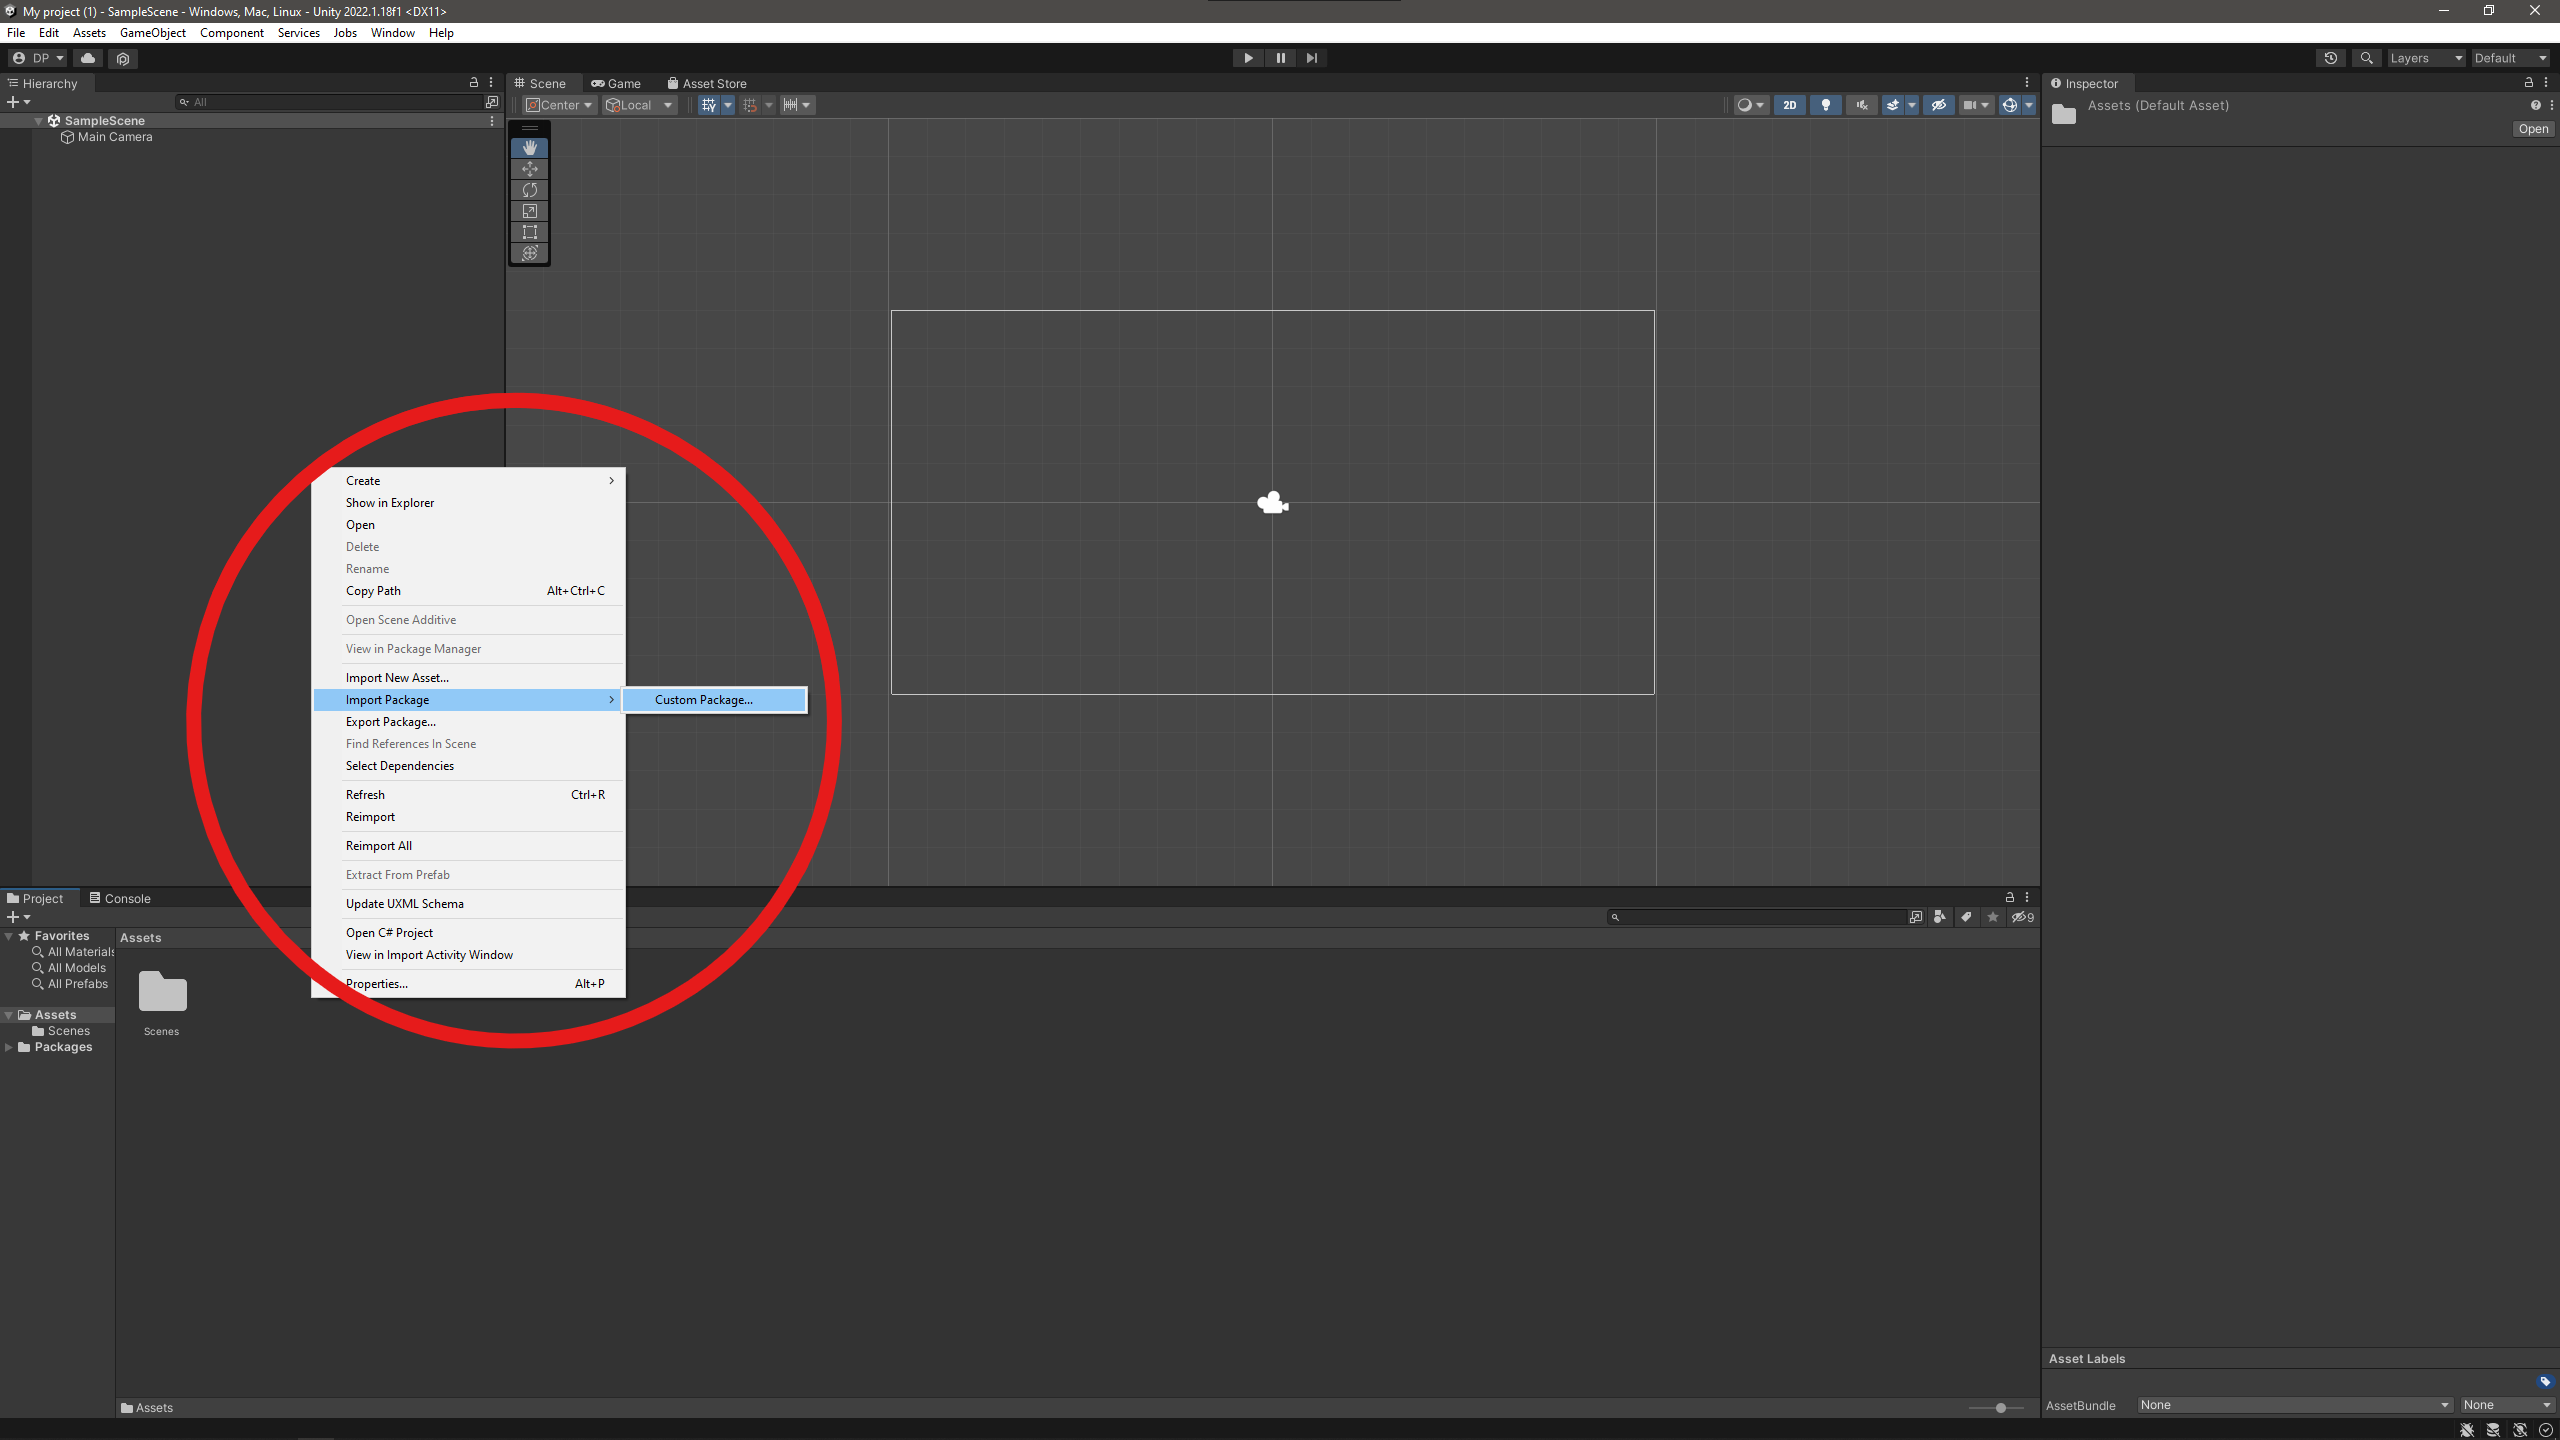
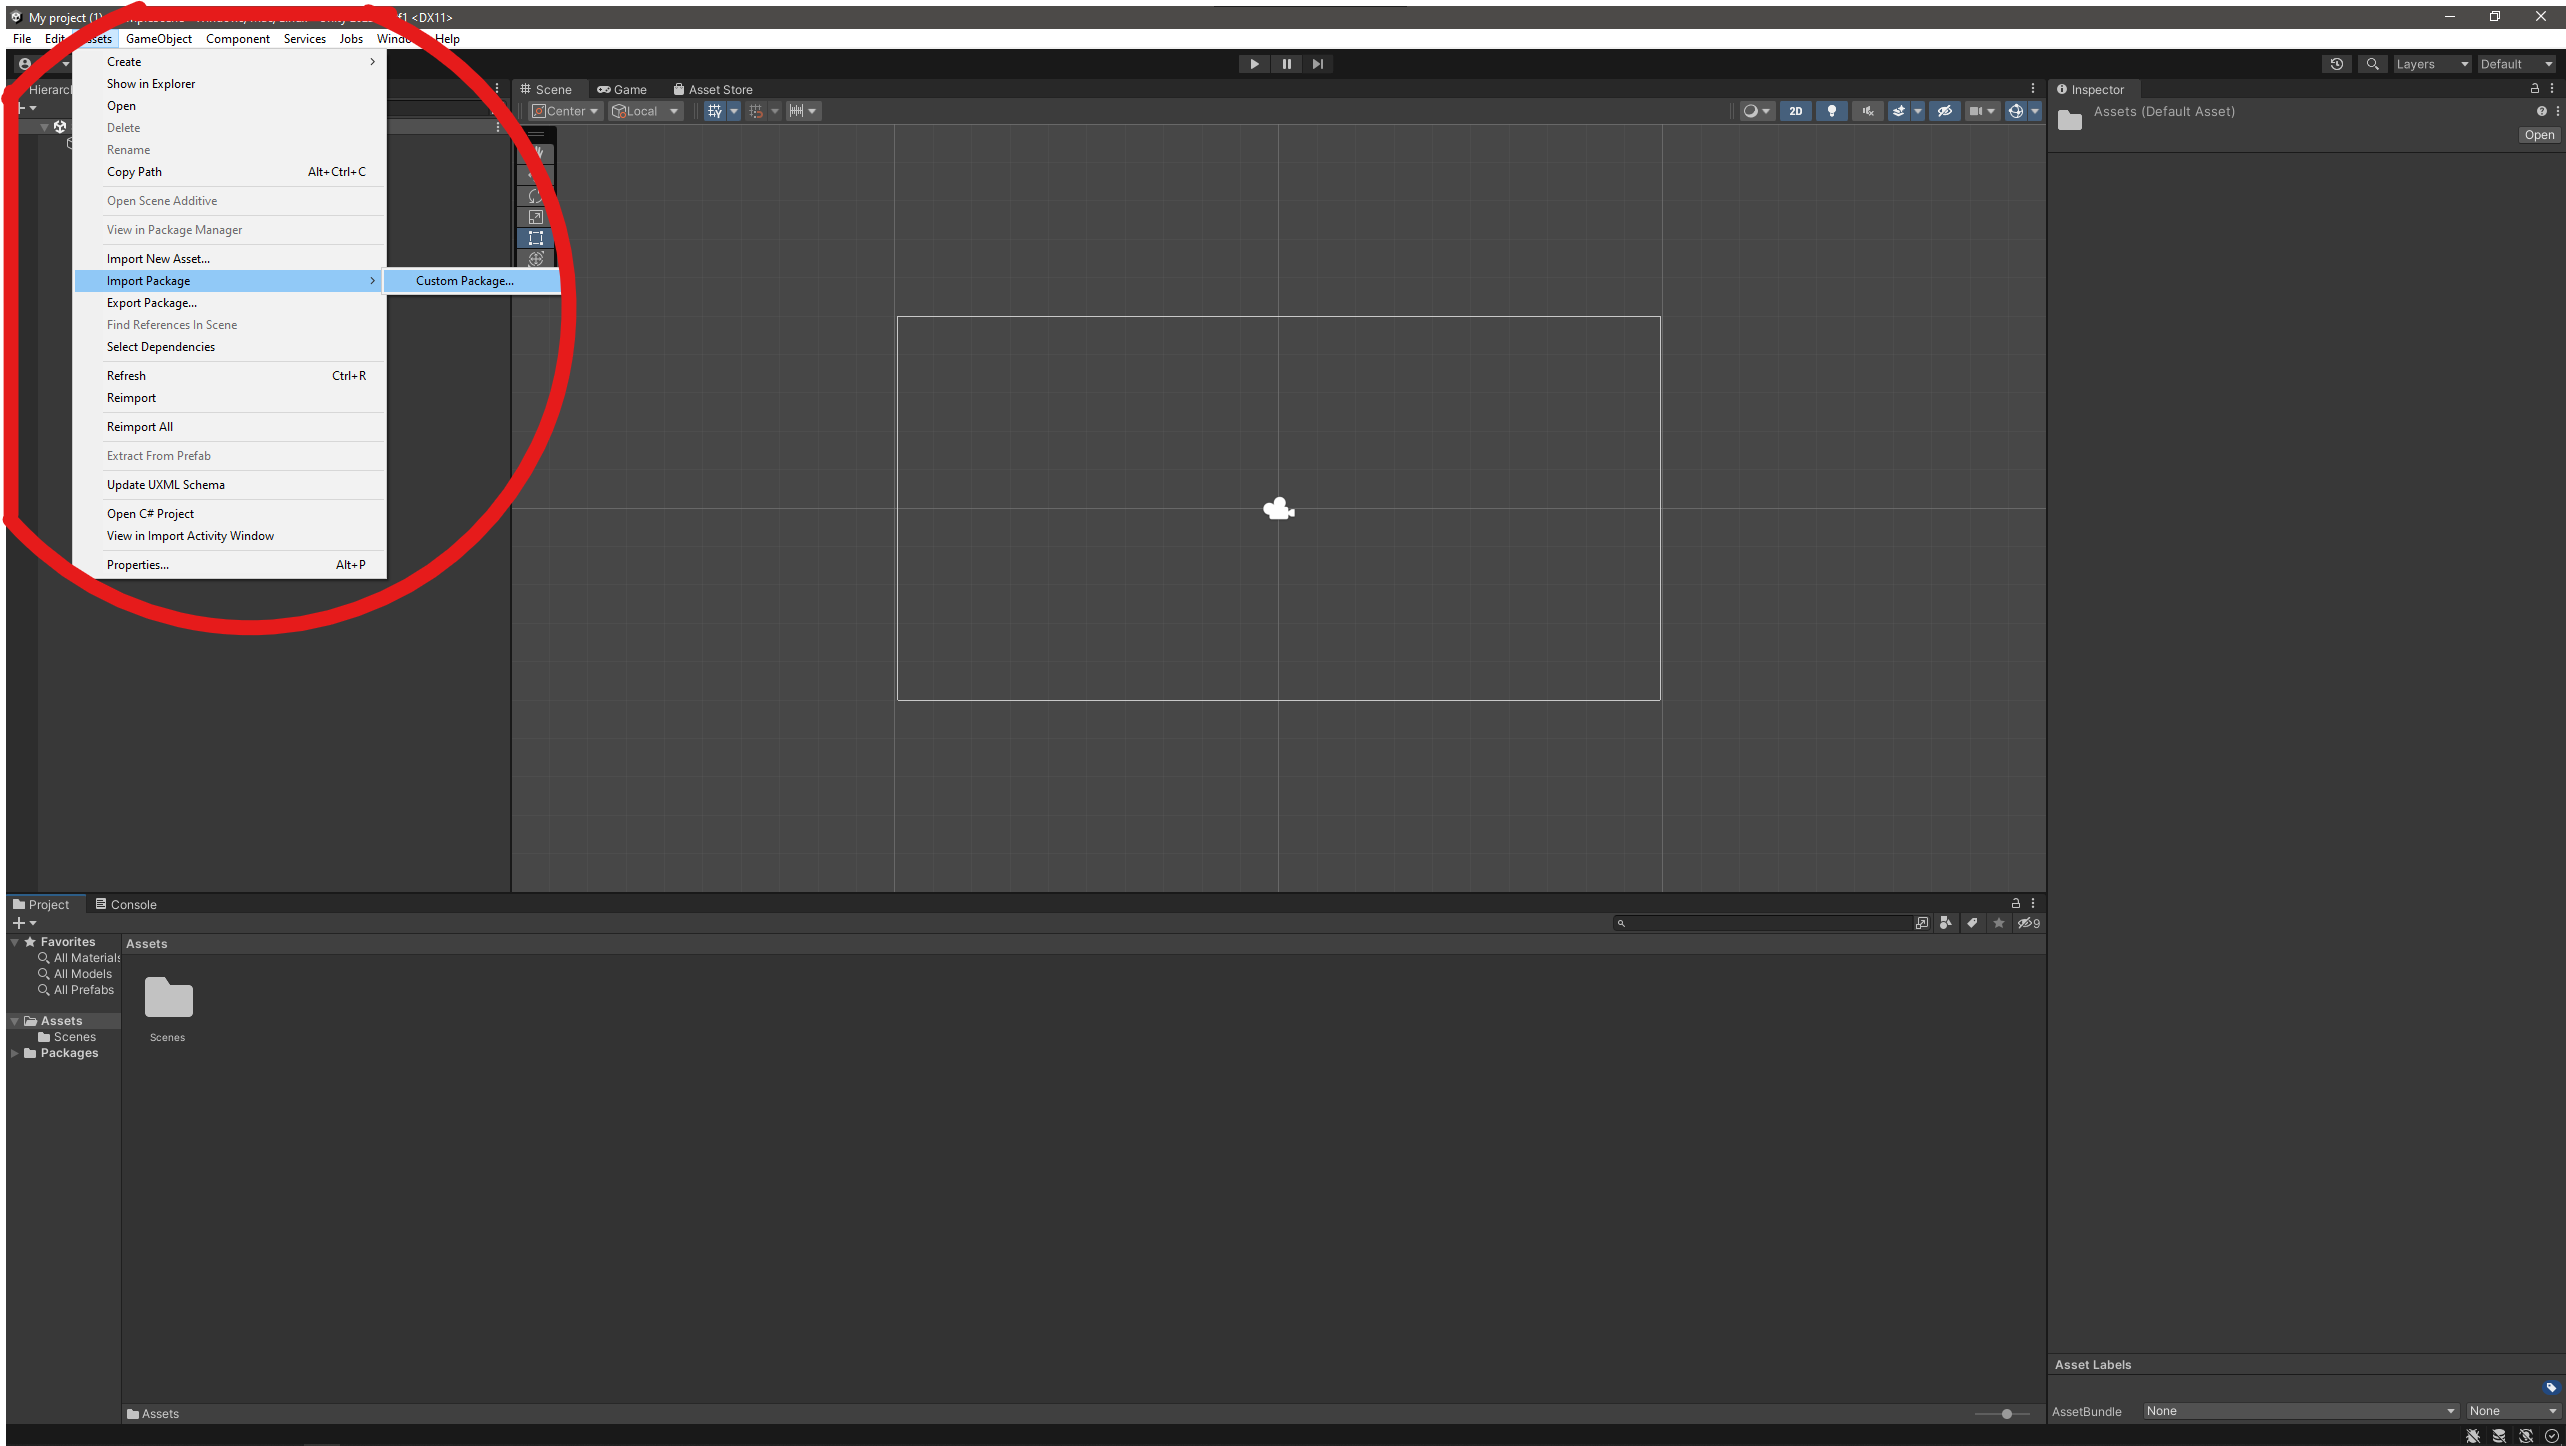
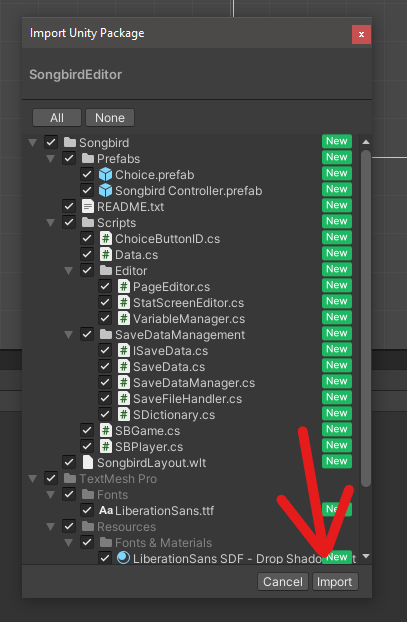
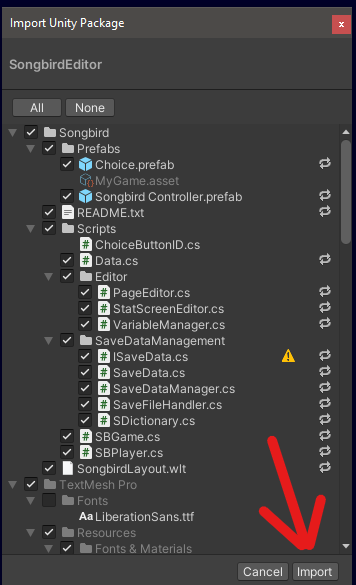
From there you can select the unzipped .unitypackage file containing the Songbird Editor. You will be prompted to verify and accept files, all files and the TextMeshPro dependency are required. After this you will need to import the UI Accessibility Plugin separately, as Unity tends to misplace some dependency files if they're exported in the same package. The process is exactly the same.
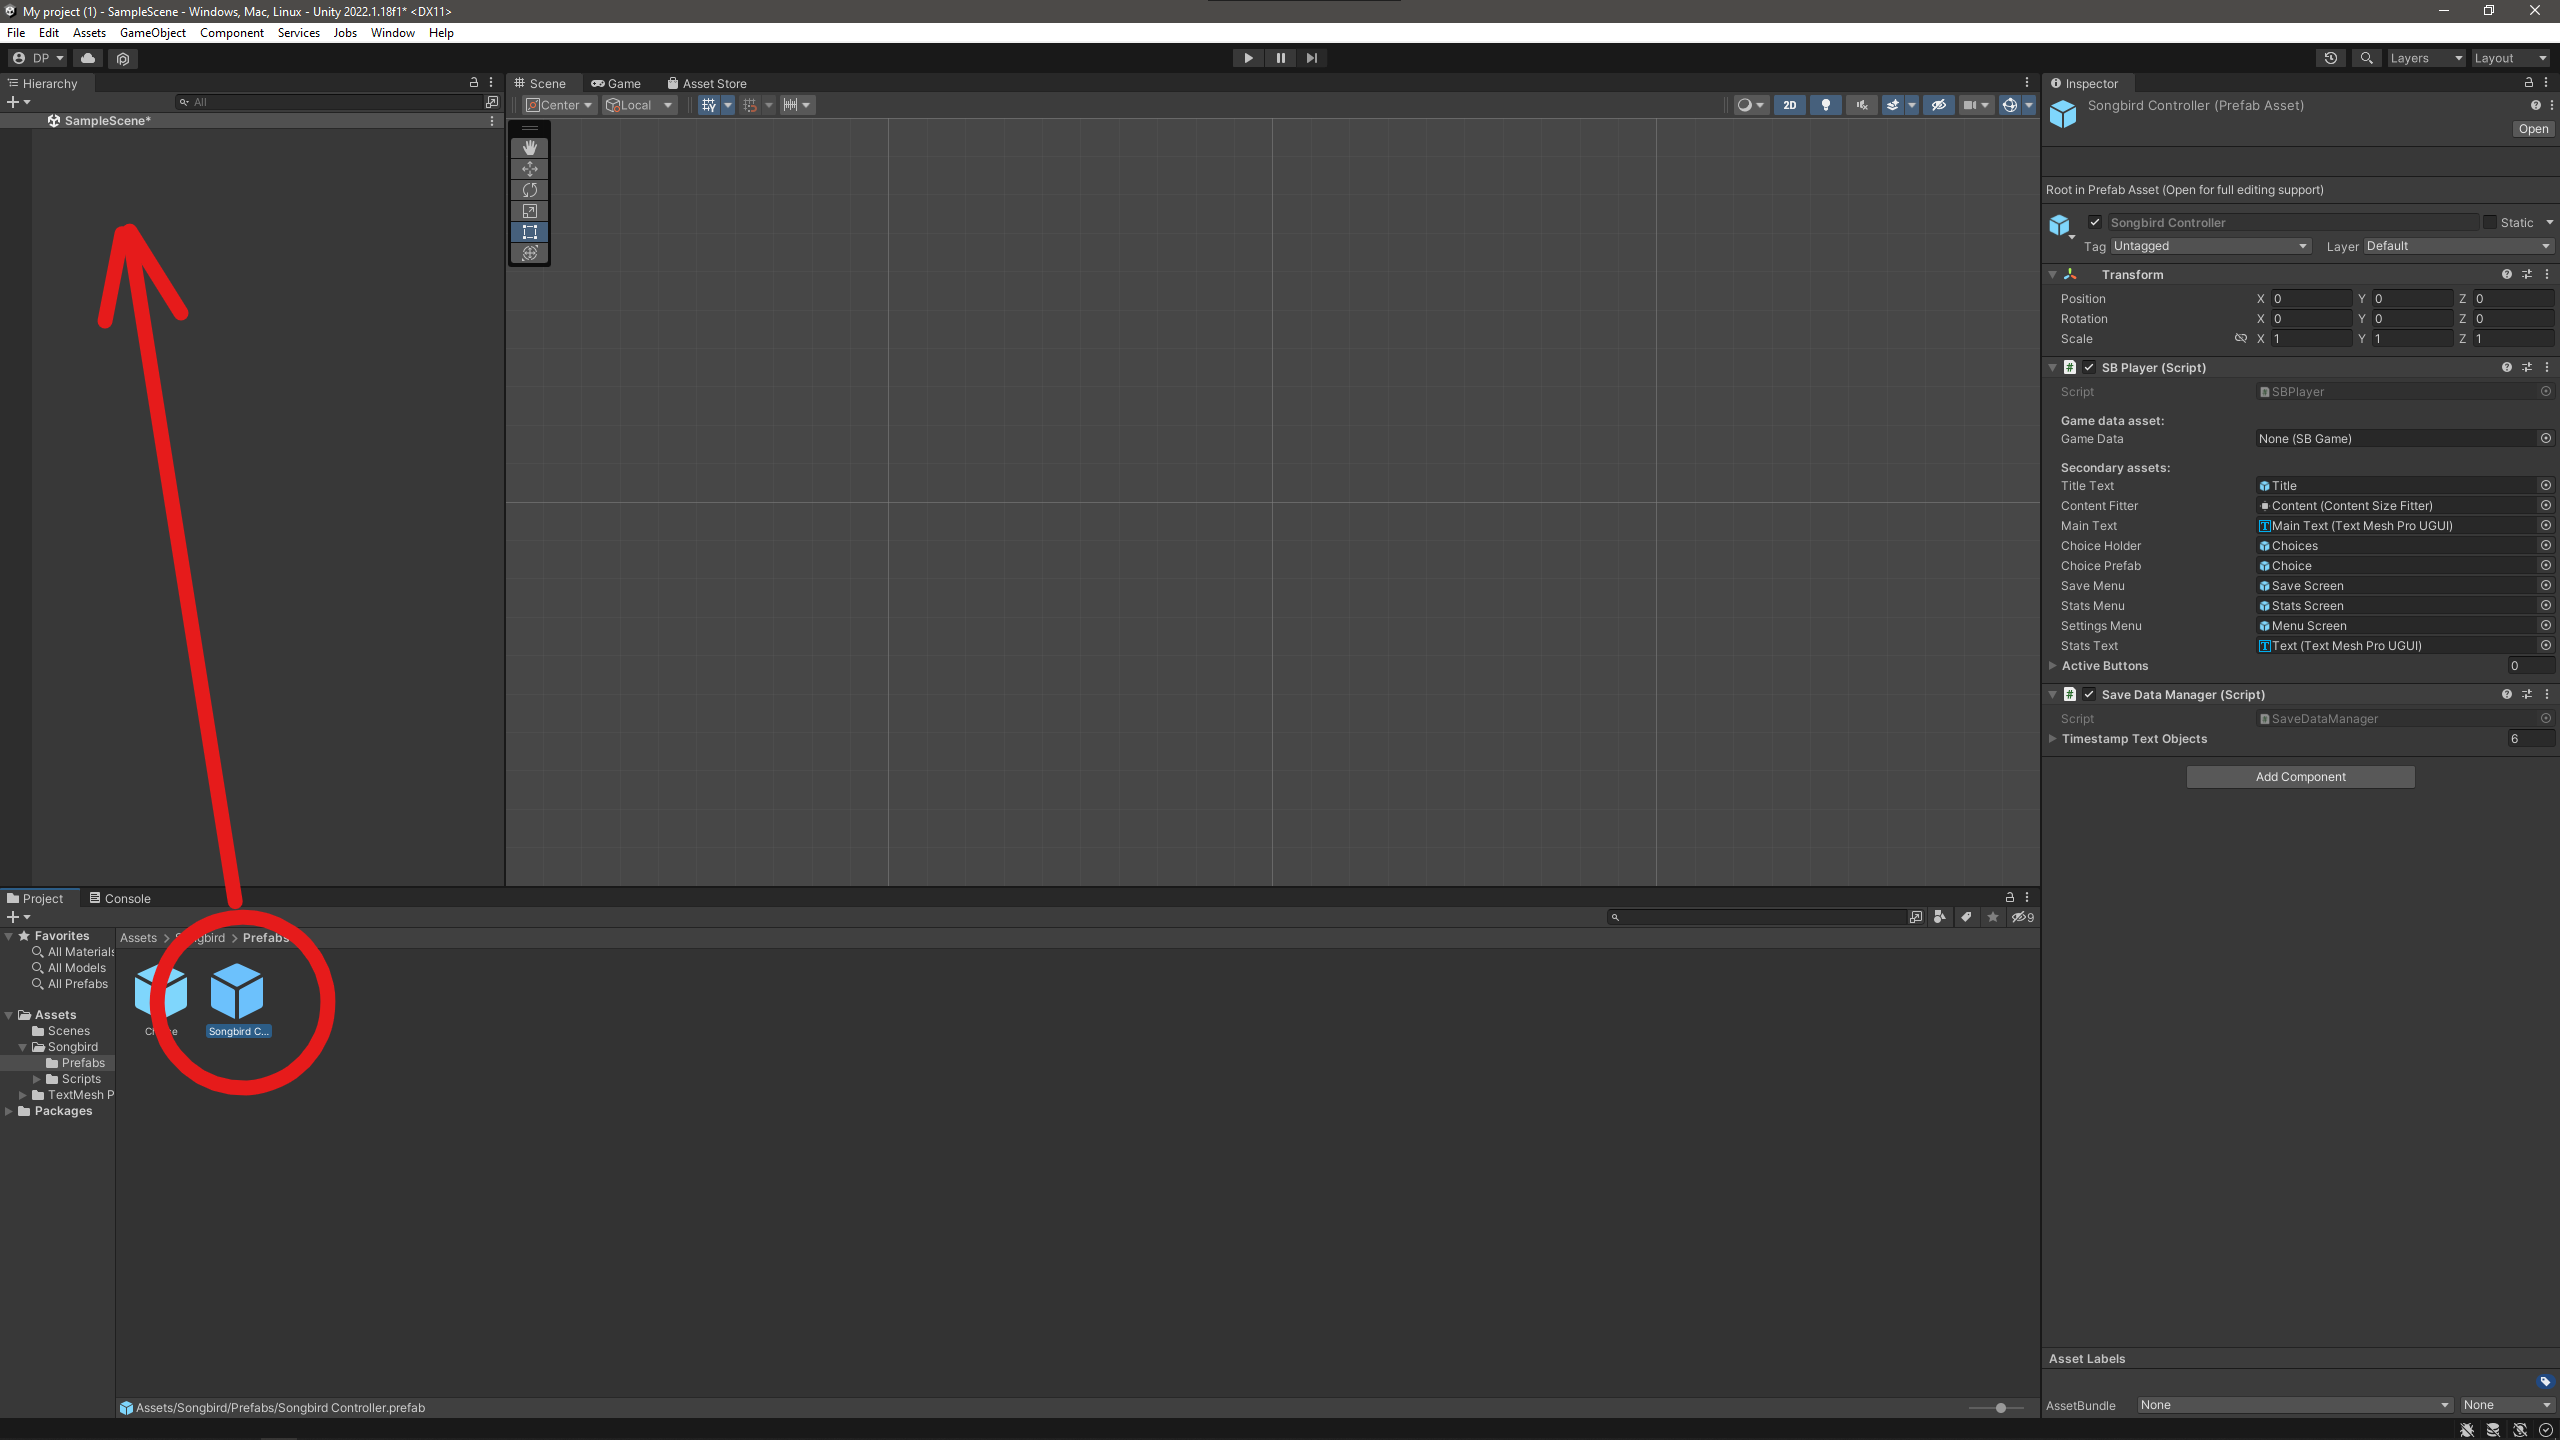
Once imported you can finalize setting up the project for building your game. Delete the Main Camera and all other assets from the Hierarchy tab on your left and in it's place drag in the Songbird Controller prefab (found in your newly imported assets under Songbird/Prefabs).
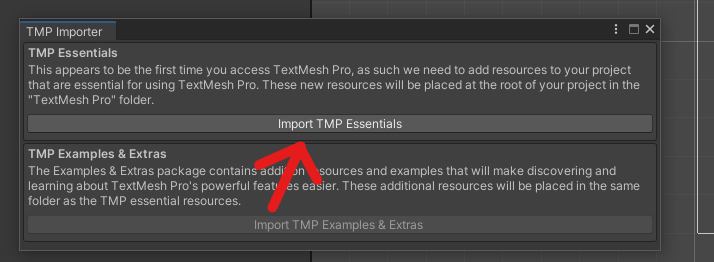
You will most likely be prompted by TextMeshPro to import it's files, press Import TMP Essentials and let it finish. You don't need to import examples and extras. Close the importer window once finished. If the window doesn't show up it's okay, it just means TextMeshPro is already imported from another source and you can skip this step
By default there is a short premade tutorial game that's meant to help you familiarize with the system in an interactive way. You can use it to test out Songbird's functionality at your own pace. When you're ready to start making your own game you should however create your own game data file before writing and designing it. This file will contain all scenes, variables and other data used by your game. You can create this file by once again opening the asset menu and then selecting Create->Songbird->Game file.
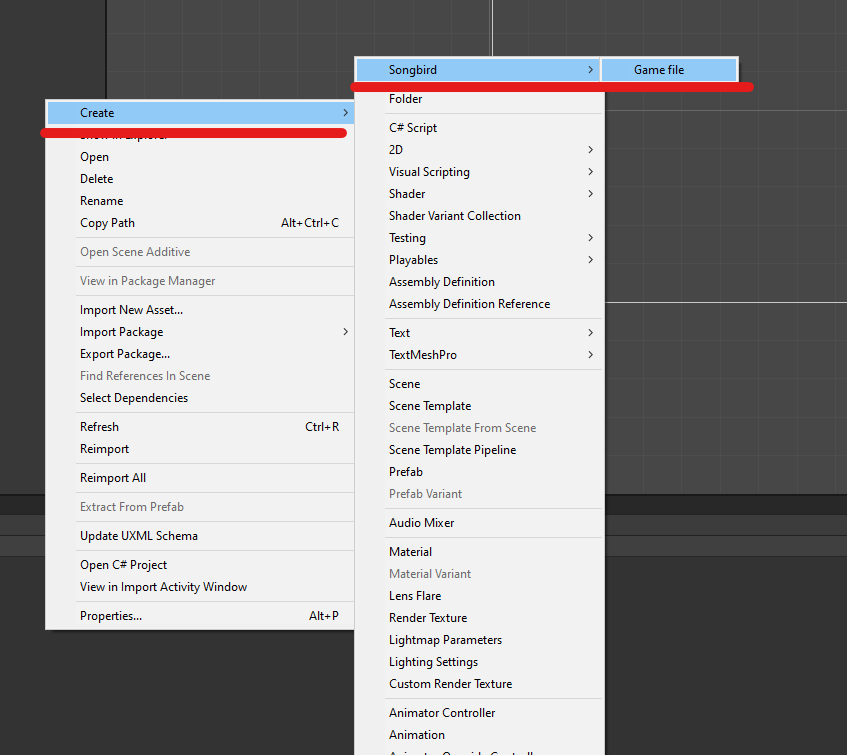
You can rename the file as you wish, but keep in mind that Songbird will use the name of this file to name all save files connected to your game as well as use its name to search for any existing save files.
Once the file is created click on the Songbird Controller asset you dragged into Hierarchy to open it in the Inspector found on the right side of the window. Once there drag your new game data file into the Game Data slot of SB Player.
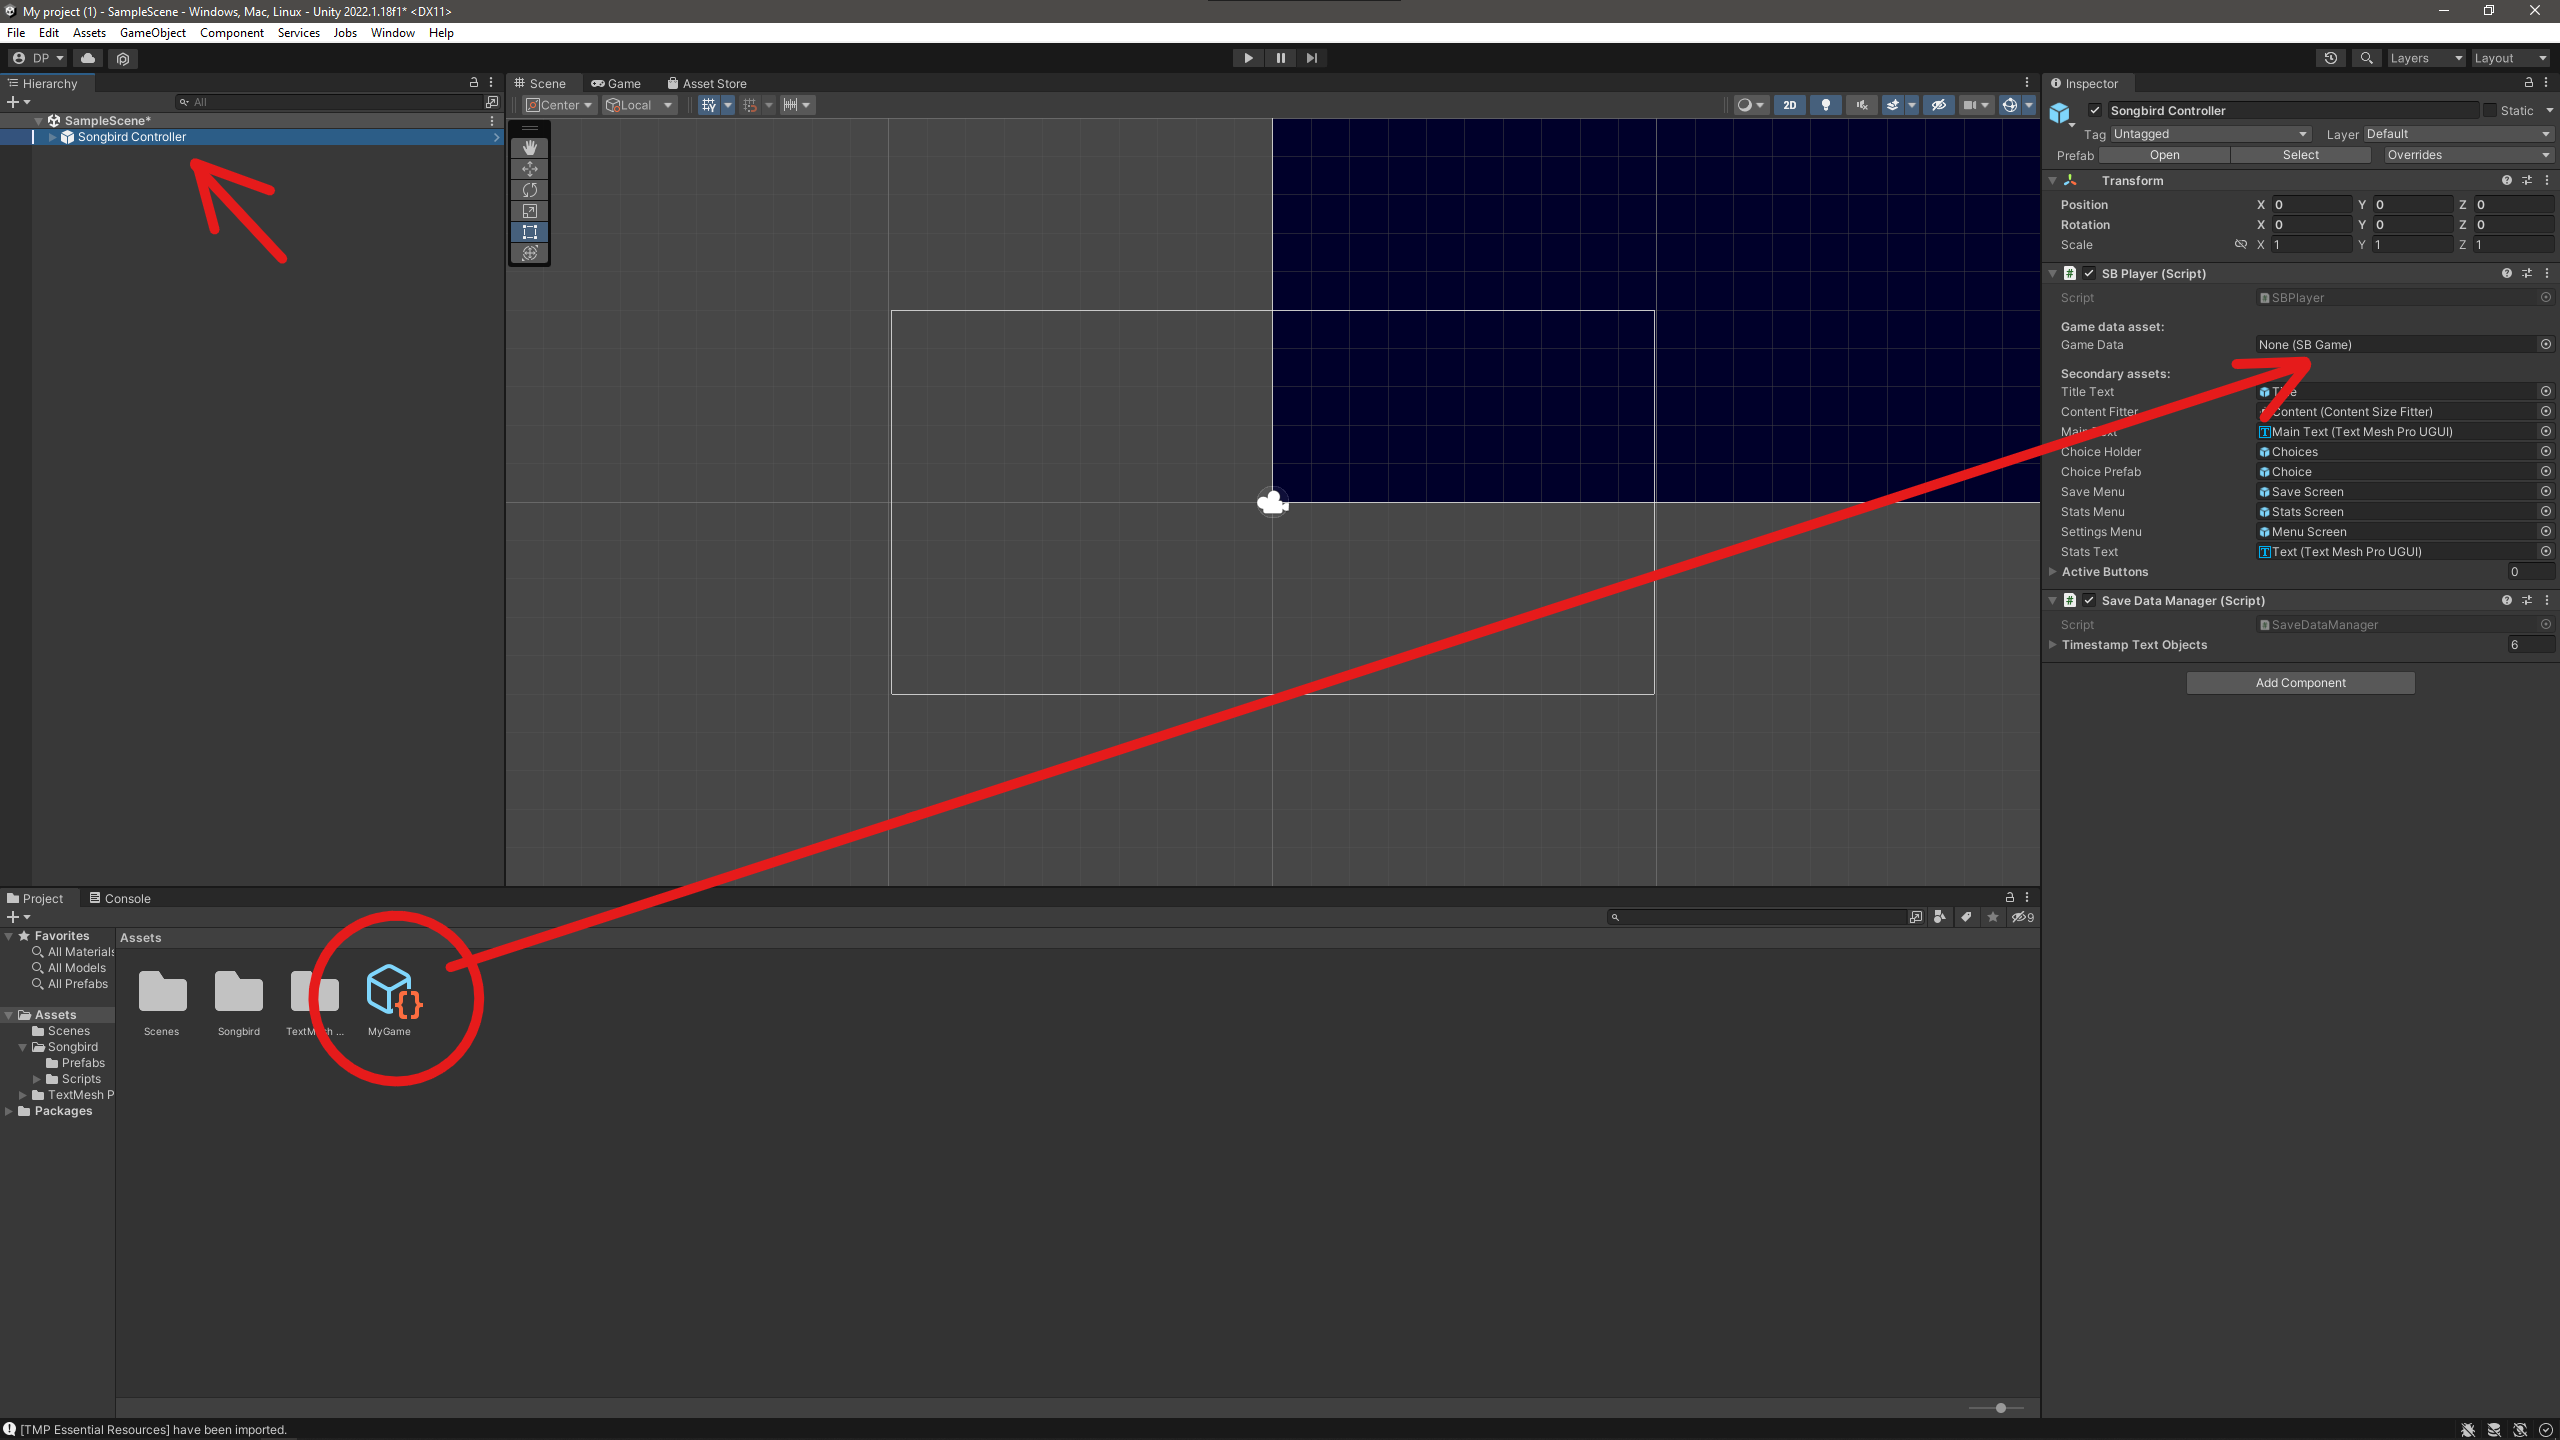
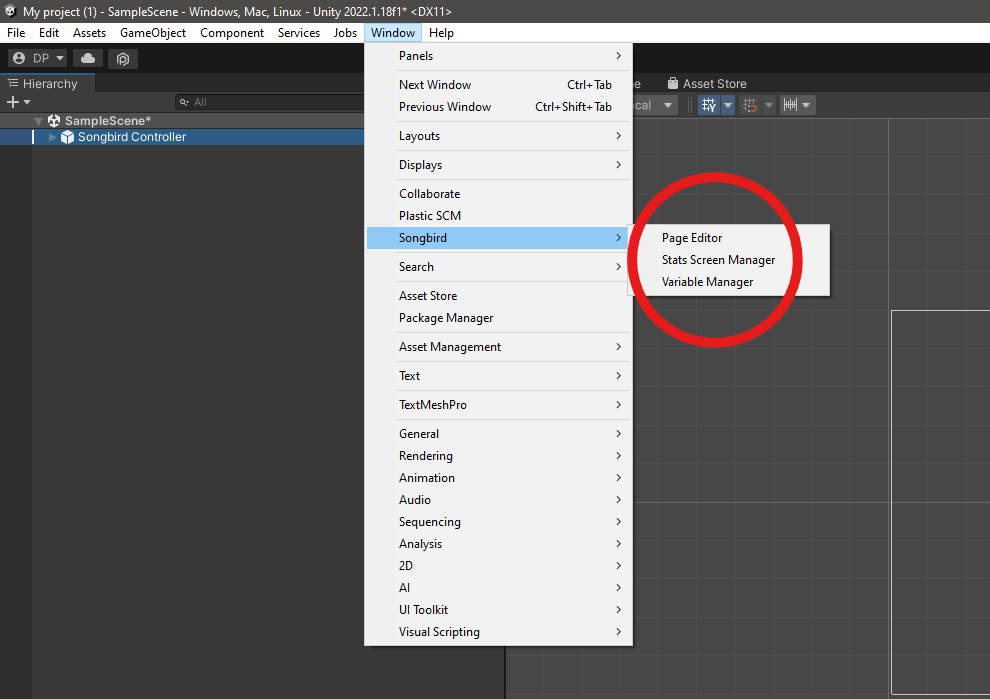
At this point Songbird is ready to use. To start building your game you can use the editor windows that can be found under Window/Songbird.
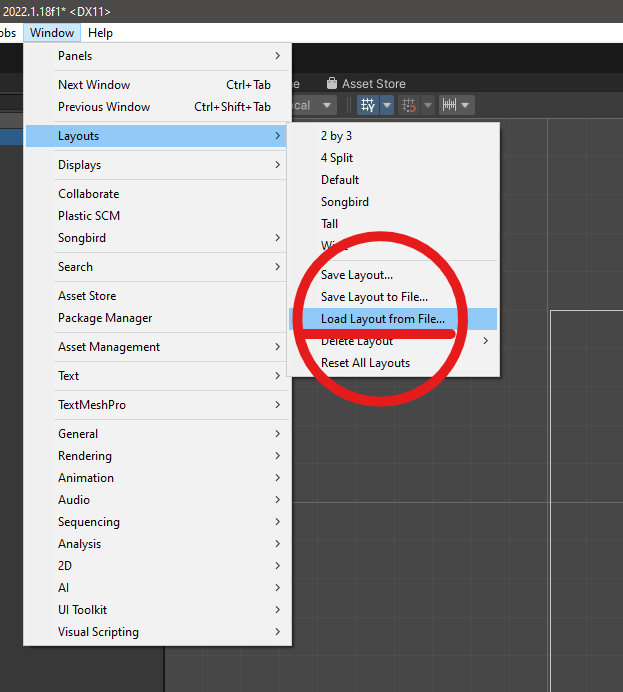
Alternatively you can load in the recommended layout for Unity included in the Songbird folder of your project which will reorganize the window to be more friendly to creating and testing as well as attach all editor windows automagically.
To import the layout navigate to Window/Layouts/Load Layout from File... and navigate to the SongbirdLayout.wlt file via Explorer. The file can be found in the Songbird folder of your project assets by default. You can use Show in Explorer to see where that is on your drive.
If you opened any of the editor windows before attaching the game data file or the file doesn't load in properly you might receive a wave of errors and the editor window might not load properly. To fix this you will need to make sure the game data file is attached and either close the editor windows and open them again or launch and close the game simulation by pressing play at the top center twice.

- Updating existing projects
In order to update Songbird in your existing project you need to repeat the importing process using a new package. There's no need to delete old files as Unity will automatically replace any modified files. Your game files should remain unaffected by the update regardless of which folder they're currently in.
This concludes the installation guide for Songbird. If you have any questions or encounter errors feel free to mention them below. This guide will be edited over time to accommodate received feedback.