This is part 2 of an in-depth guide for Songbird Editor. It covers the interface and available features as well as building your game.
Page Editor Window
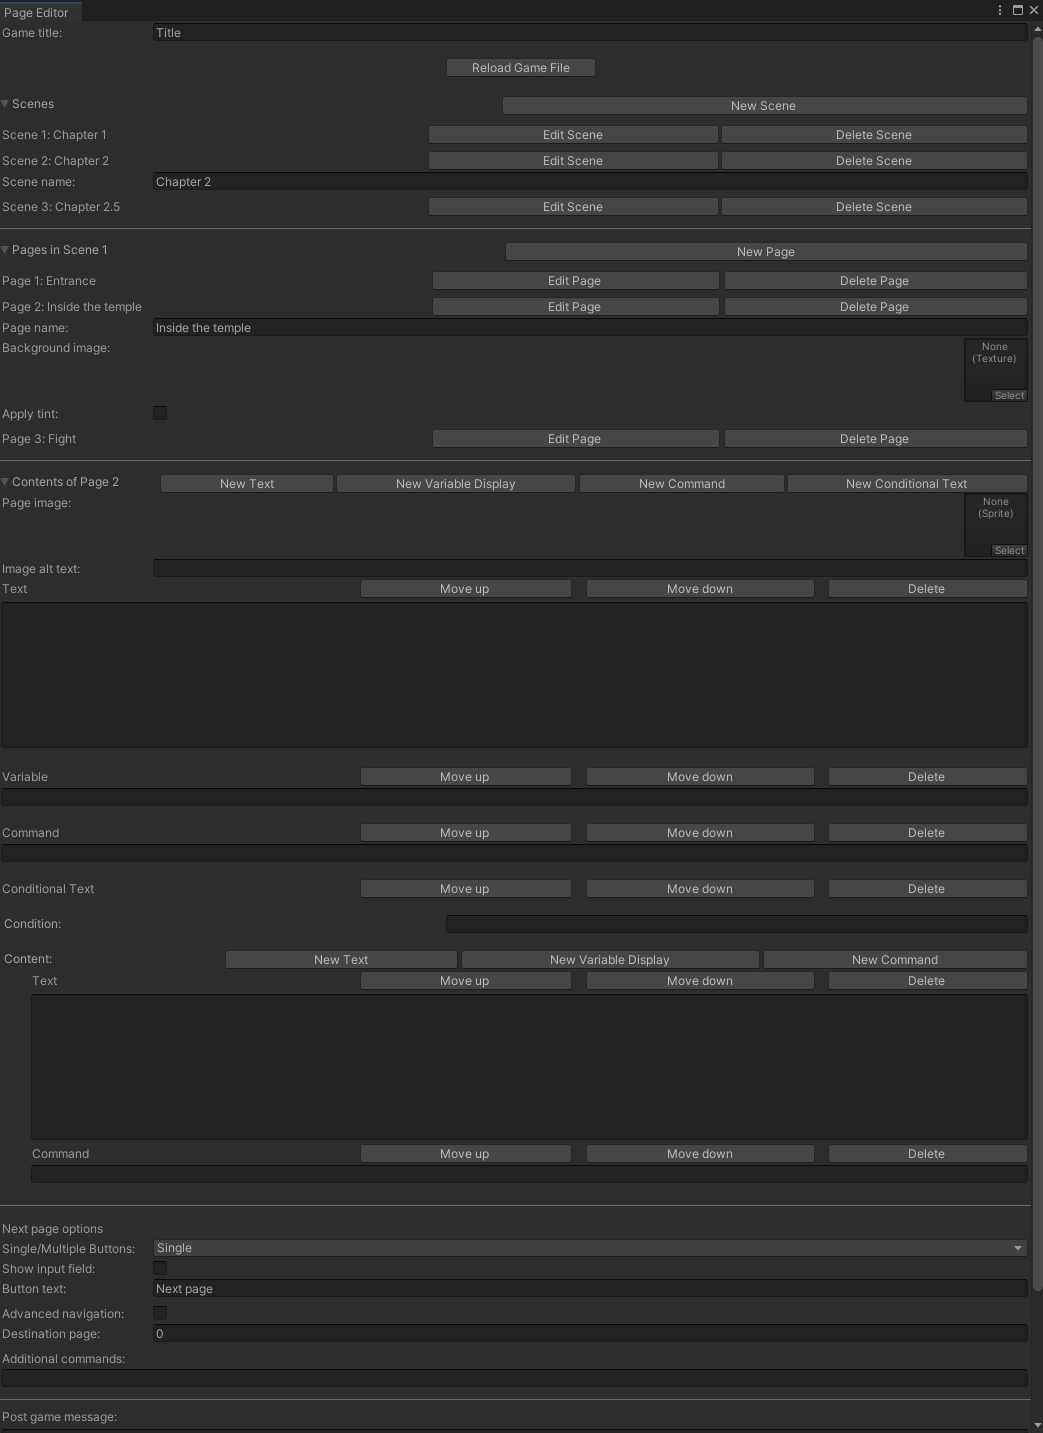
The Page Editor window is the main part of Songbird and where you will spend the most of you time while working with it. You can add scenes, pages inside those scenes and fill those pages up with elements that will build your content.
- Scenes and pages

You can add additional scenes by pressing the "New Scene" button. Each scene can be named to help you remember what they contain. Once you have multiple scenes you can change between the one currently open in editor by pressing the "Edit Scene" button next to the appropriate scene. Each scene can also be deleted if necessary by pressing "Delete Scene". This action is irreversible so be careful about deleting things.
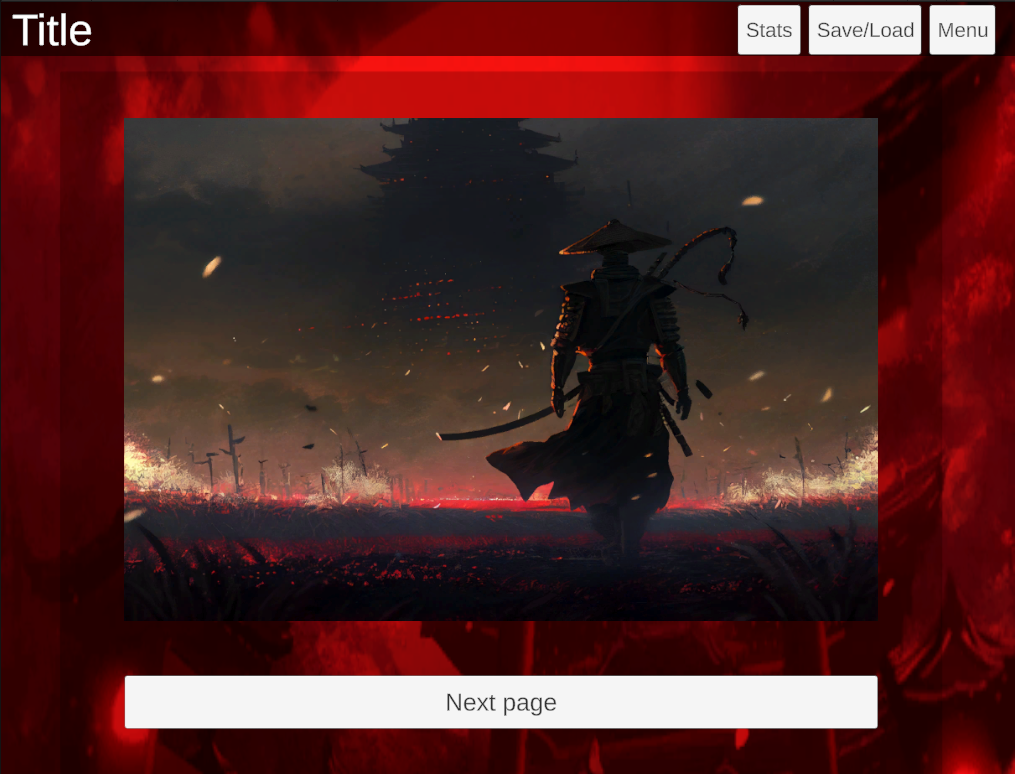
Creating, editing, naming and deleting pages works in the same way. The list will always display all pages inside the active scene. Additionally you can drag in an image from your assets folder into the background image slot to have the background change upon loading the specific page. By default any image loaded in will be automatically stretched to fit the current screen aspect, so it is recommended to select images with proportions and orientation close to the ones expected on a target device (like 16:9 for desktops and 9:16 or 9:18 for mobile devices). The new background will persist between pages and scenes until a page with a different background is reached. You can also set background colors or tint background images. To do this toggle the “Apply tint” checkmark under your active page and select the new color. If a custom background image is applied the color will tint the image. The new color will persist until a page with a different color or a new image is reached. To reset the image tint, set the new color to white.
- Page elements
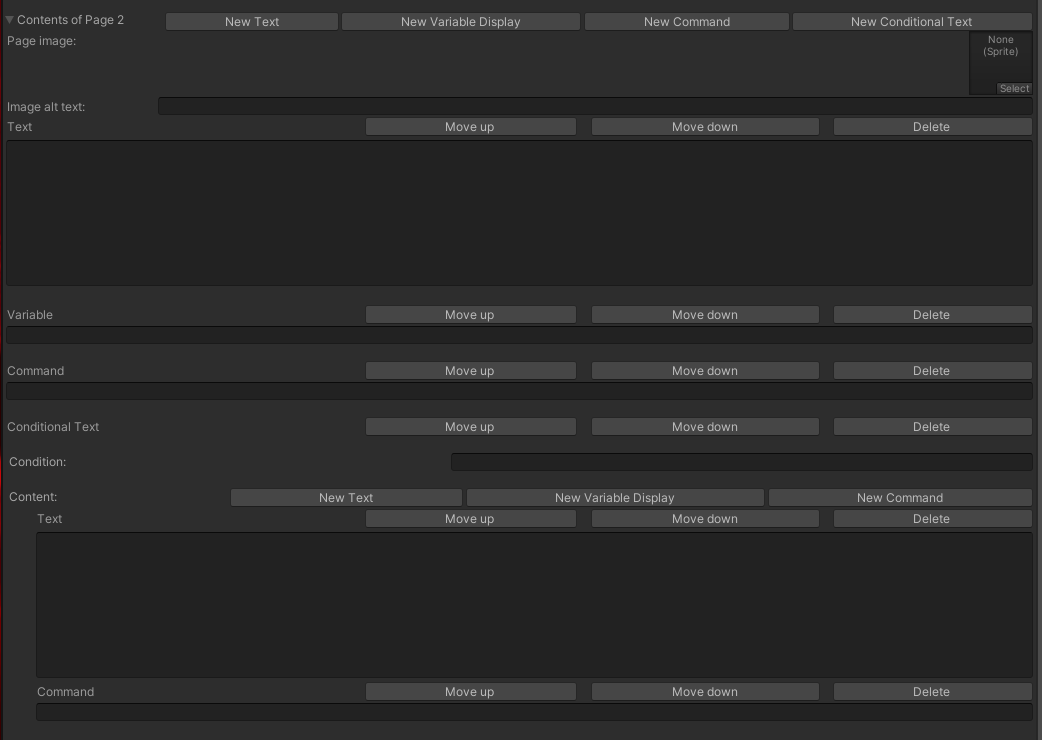
At the top of each Page Contents section is a slot for an optional image that can be displayed above the page text. Images will be automatically scaled down or up to fit the content field while retaining their aspect ratio. Optionally you can fill out the alt text field to add some information that will be read out to players using accessibility mode.

Additionally each page can be filled with an infinite number of content elements. Each of those elements will be read by the controller which converts their contents into text or functions. There are 4 types of elements available at the moment:
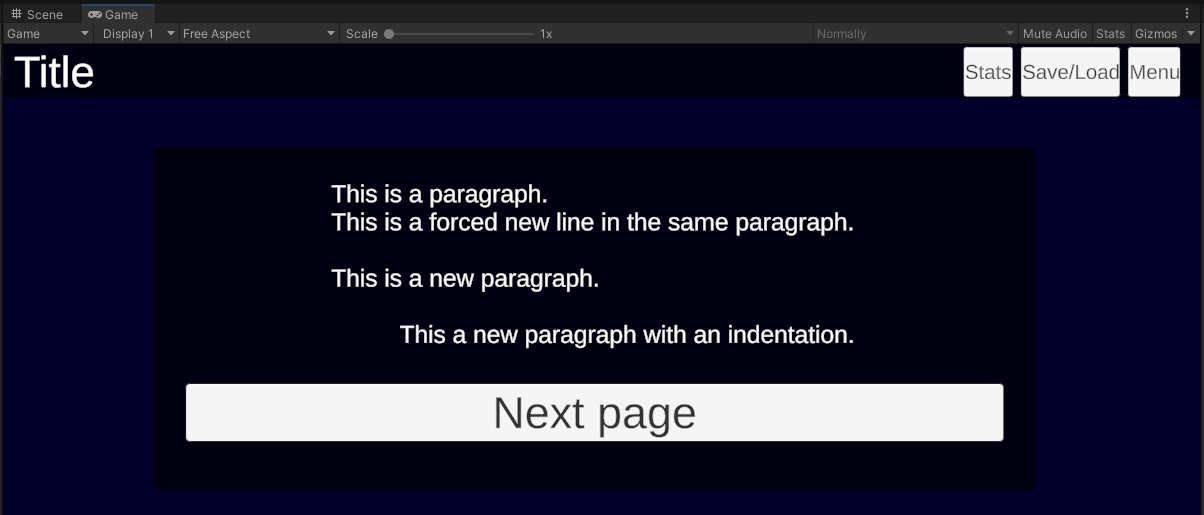
Text - These blocks will simply output written paragraphs onto the page as is. Inserted text will take into account all tabulators and enters, displaying text as formatted in the text box.

Variable display - These blocks display the current value of a variable written in its text field. By default the value will be added as is with no spaces either in front of behind. You can capitalize the variable by placing one exclamation mark (!) in front of its name for first letter capitalization or two (!!) for full capitalization. Additionally placing a dot (.), comma (,), a question (?) or exclamation (!) mark at the end will insert those plus a single space behind the variable. You can also insert a single space at the end to have it inserted in the same way. Please note that capitalization in variable names matters.
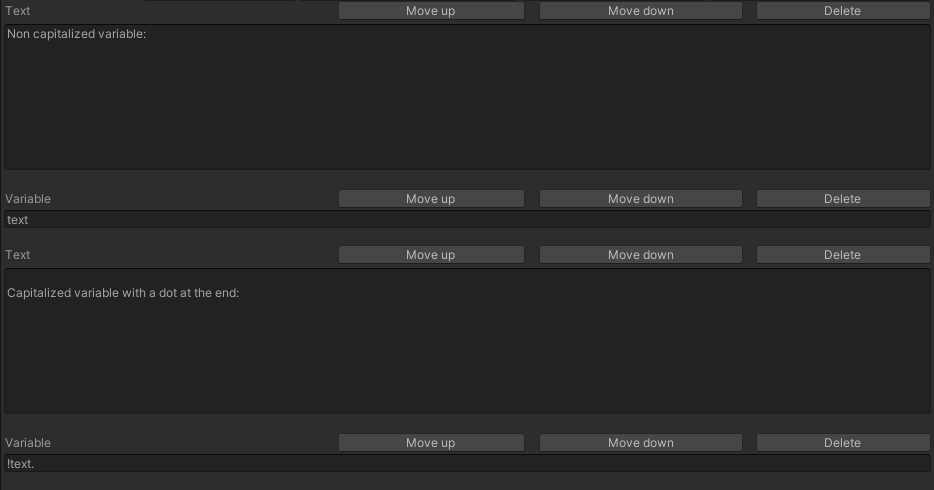
Alternatively you can put a variable display command directly into a text block by enclosing the desired variable's name in {} brackets. Space inside those brackets behaves in the same way as a dedicated variable field and will process capitalization and adding dots and commas.


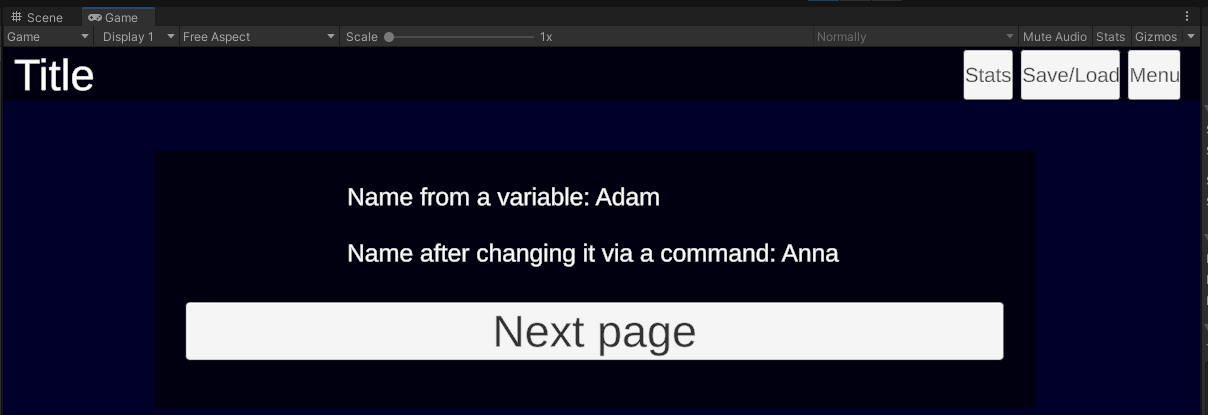
Command - These blocks execute commands inserted into the command field. These commands can be used to alter variable values. A single field can take in multiple variables, in that situation each variable should be written in a new line. For a more detailed explanation of commands you can refer to the relevant part in the advanced features section of this guide.
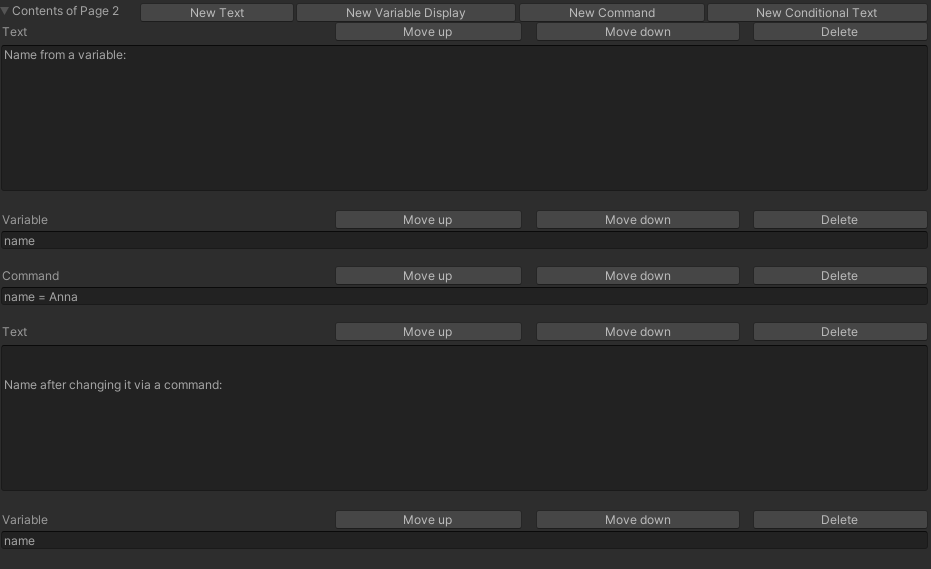
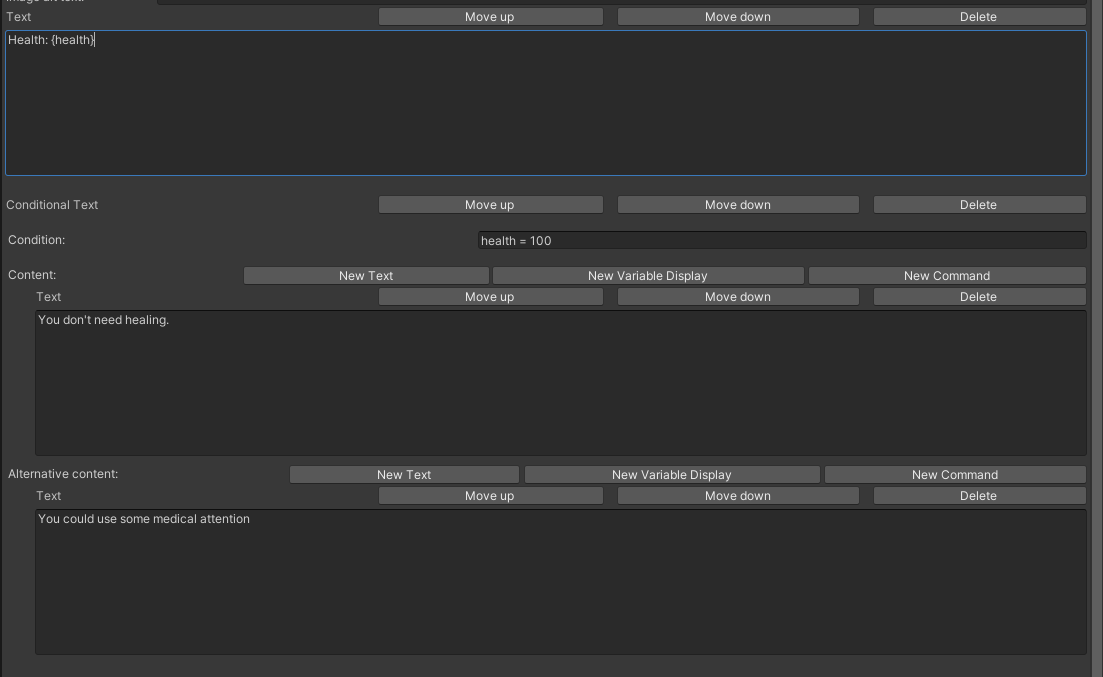
Conditional Text - These blocks will only display elements inside them if a condition written in the appropriate field is met. Conditional blocks can be customized to contain multiple different elements like text, commands and variables. Below any conditional elements is a place for adding alternative elements. Those blocks will be read if the condition isn't met instead. For a more detailed explanation of conditions and how to create a more expanded syntax you can refer to the relevant part in the advanced features section of this guide.
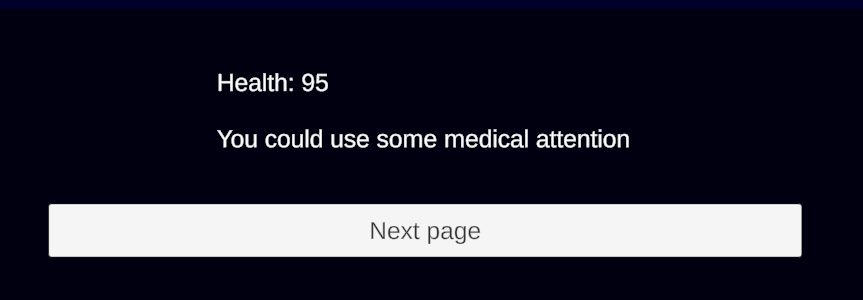

Choices and navigating pages in game.
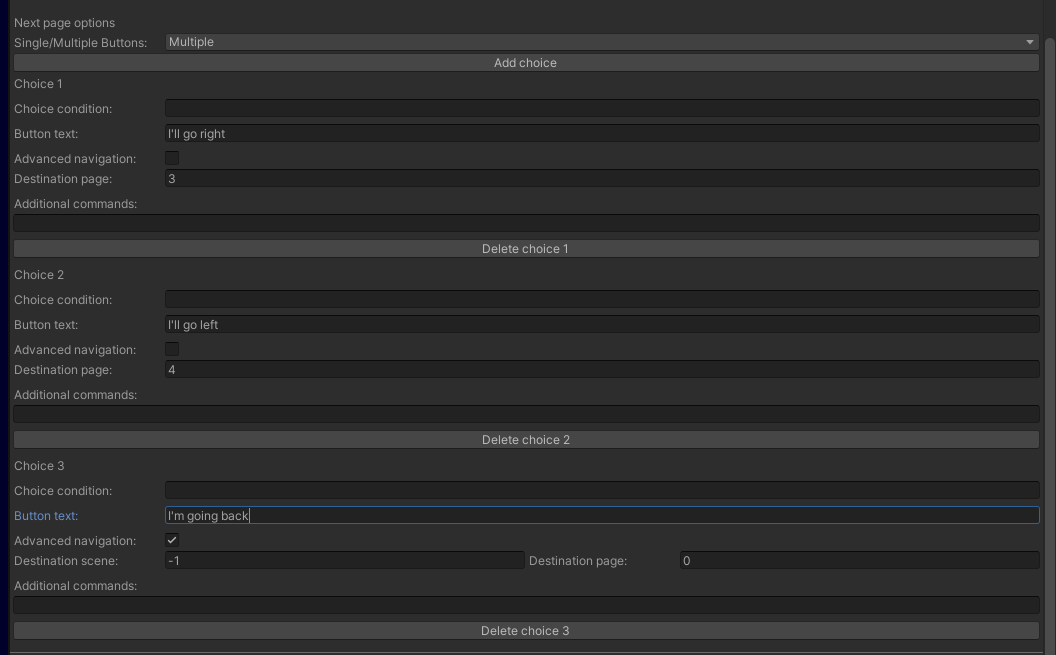
Just below all the created page elements is a menu for customizing how a page ends. You can select between a single and multiple buttons and edit the contents of each button. Switching to a single button after creating more will not delete any buttons. Instead all buttons but the first will be hidden both in editor and in game.
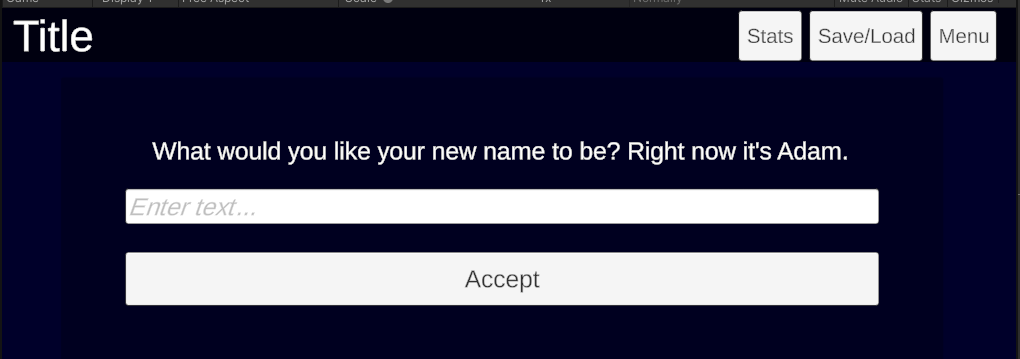
While in single choice mode you have the option to insert a text input field into the page. The field will take the text written into it and assign it to a text variable written into the field that appears below the toggle when it's selected. If the player attempts to leave the field empty they won't be able to proceed to the next page. If the target variable doesn't exist of isn't of type text the input function will be skipped and the game will proceed without assigning anything.

In multiple choice mode you can make a choice appear only in specific situations by writing a condition for it to appear. Those conditions use the same syntax as conditional elements. For a more detailed explanation of conditions and how to create a more expanded syntax you can refer to the relevant part in the advanced features section of this guide.
You can use the button text field to add your own text into the choice button.
Each button can be individually colored in the same way you color a page background. Selected colors will only apply to choices on the current page and won't carry over to subsequent pages.
The destination page field can be used to navigate to different pages in the scene. The default value of 0 sends the player to the next page in order, if you want the choice to lead to a specific page simply put in the desired page number. If said page doesn't exist the game will instead navigate to the next page in order. If there is no next page to navigate to the system will instead start reading from the first page of the next scene in order. You can also make the page move onto the next scene by inserting -1 into the field. If there is no next scene to read from the game will go to end page instead.
Switching on the advanced navigation mode will make a new destination scene field appear. Writing 0 in the scene field will force the game to go to the next scene, writing a number corresponding to an existing scene will cause the game to jump to that scene. In both cases you can select a specific page in a desired scene by writing its ID in the destination page field, if such a page doesn’t exist the first page will be loaded, leaving 0 in destination page while in advanced mode will also open the first page. You can also write -1 in the destination scene field to push the game directly into its end screen.
Under each choice you can input extra commands that will be executed before compiling the desired page. Those commands function in the same way a command field on the page itself.
Variable Manager Window
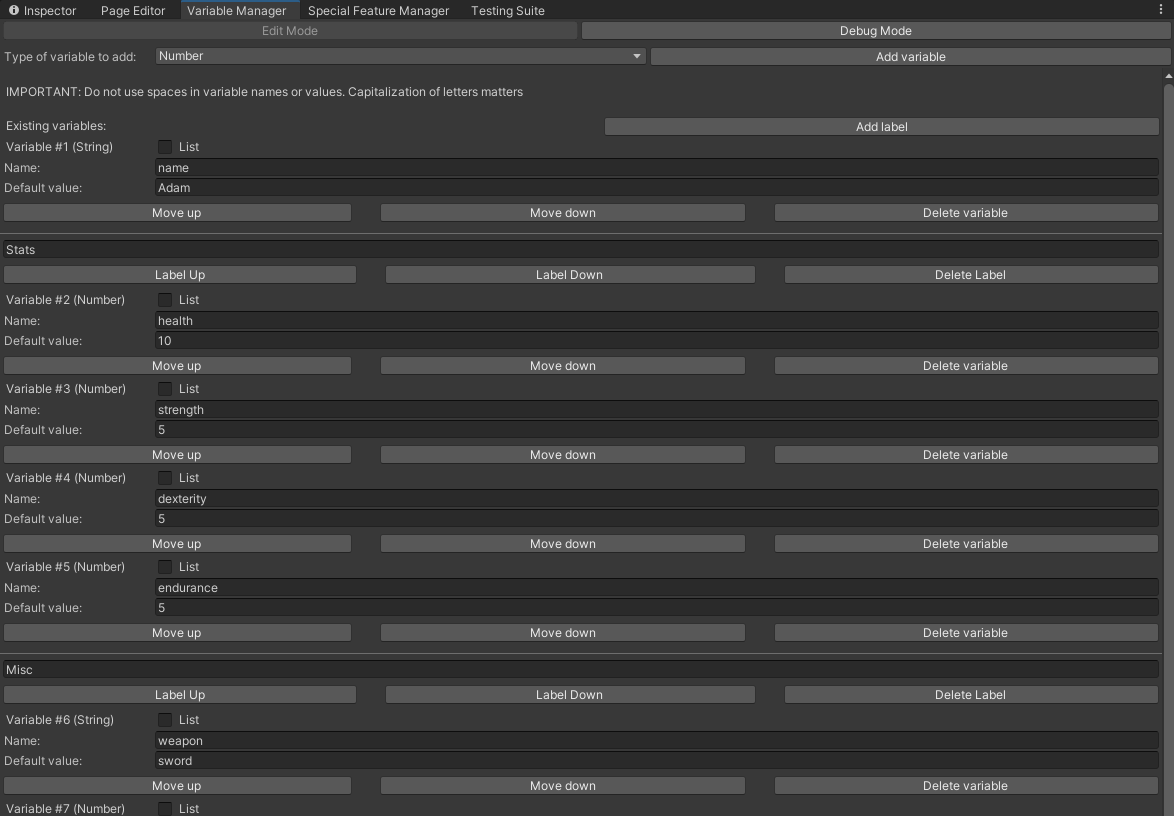
The Variable Manager window allows you to create and set starting values of your variables. At the moment there are 3 types of variables you can create:
- Text - A word or a string of characters.
Note: Spaces aren't compiled by either the command or condition functions and thus using them is discouraged.
- Number - A numerical value that functions as a double type variable. Can be used in mathematical formulas and operated on as such via commands. For a more detailed explanation please refer to the relevant parts in the advanced features section of this guide.
- Bool - A True/False type value.
You can create new variables by selecting the type of variable you want and pressing the "Add variable" button. This will create a new blank variable at the bottom of the list where you can name it and give it a starting value.
Additionally you can create labels and put them between the variables to help with organization, as well as reorder variables in the window.

Text and number type variables can be set to act as lists of those variables. To turn a variable into a list you need to switch the list toggle placed next to that variable's ID on. To place multiple elements inside a list just separate them using a semicolon (;). You can later call a specific element in your commands and calculations if it's a number type list by declaring its ID in square brackets just after the list name like so: list[X]. Element IDs start from 1, if no ID is given the system will automatically return the first element of that list. It is possible to perform mathematical operations on individual list elements.


The Variable Manager possesses a second tab called Debug Mode. By enabling it you can see a simplified view of all your variables. The displayed values will correspond to current values during your game and can be altered in real time during gameplay to help with testing your game. In this mode you cannot create, delete or organize your variables nor change their default values.
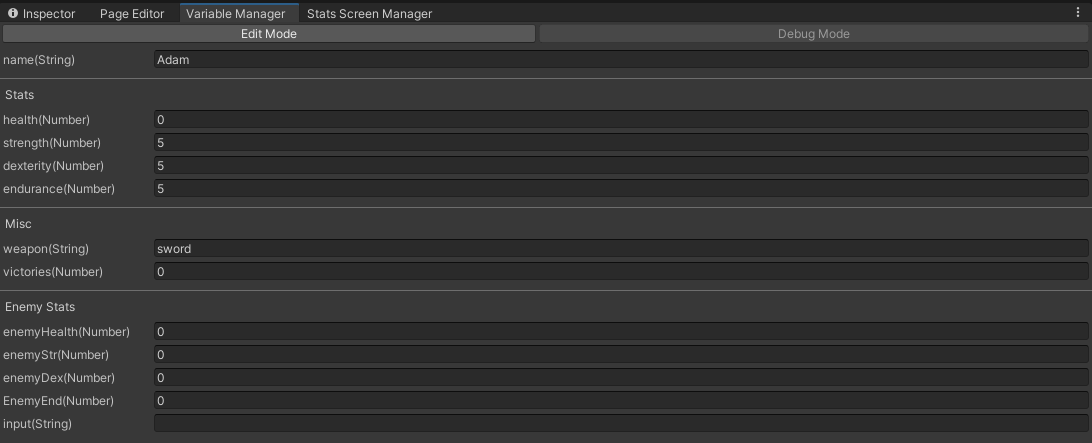
You can freely swap between Edit and Debug Mode at any time using the two buttons at the top of the window.
Special Feature Manager Window
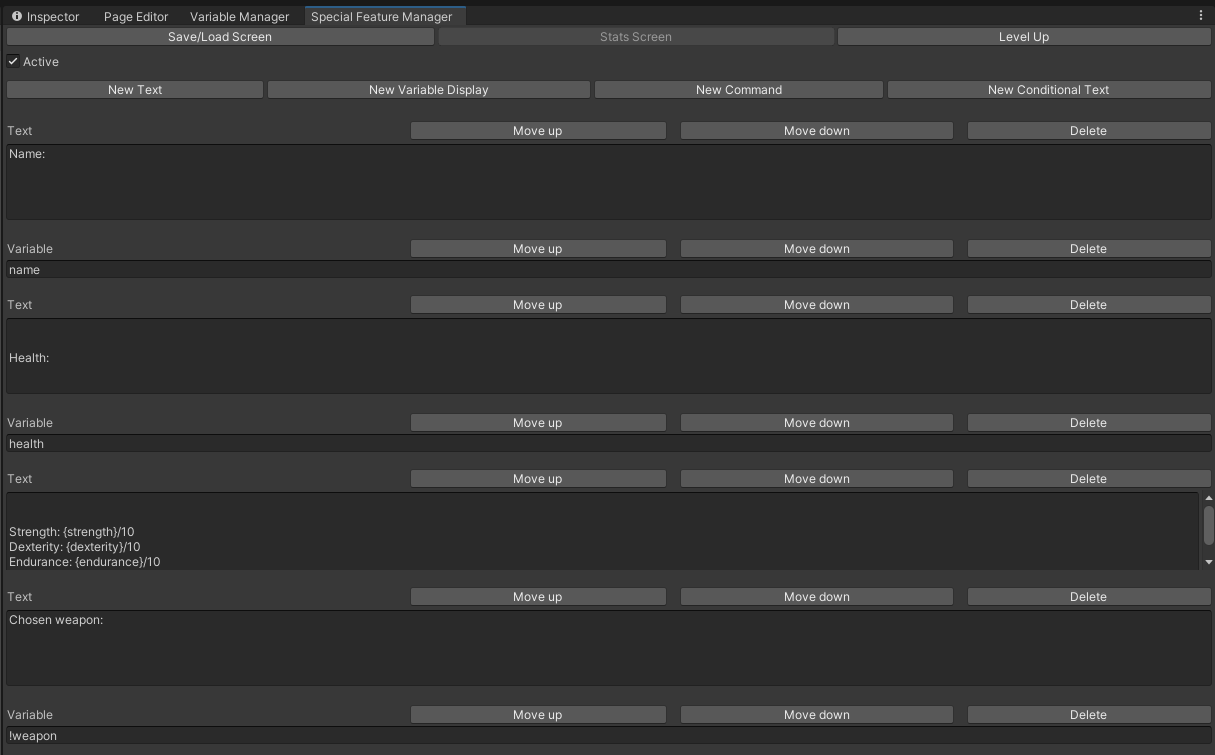
The Special Feature Manager contains multiple tabs with settings and modules that allow you to expand your game with extra systems and windows like a stats screen or a level up system.
- Stats Screen Manager
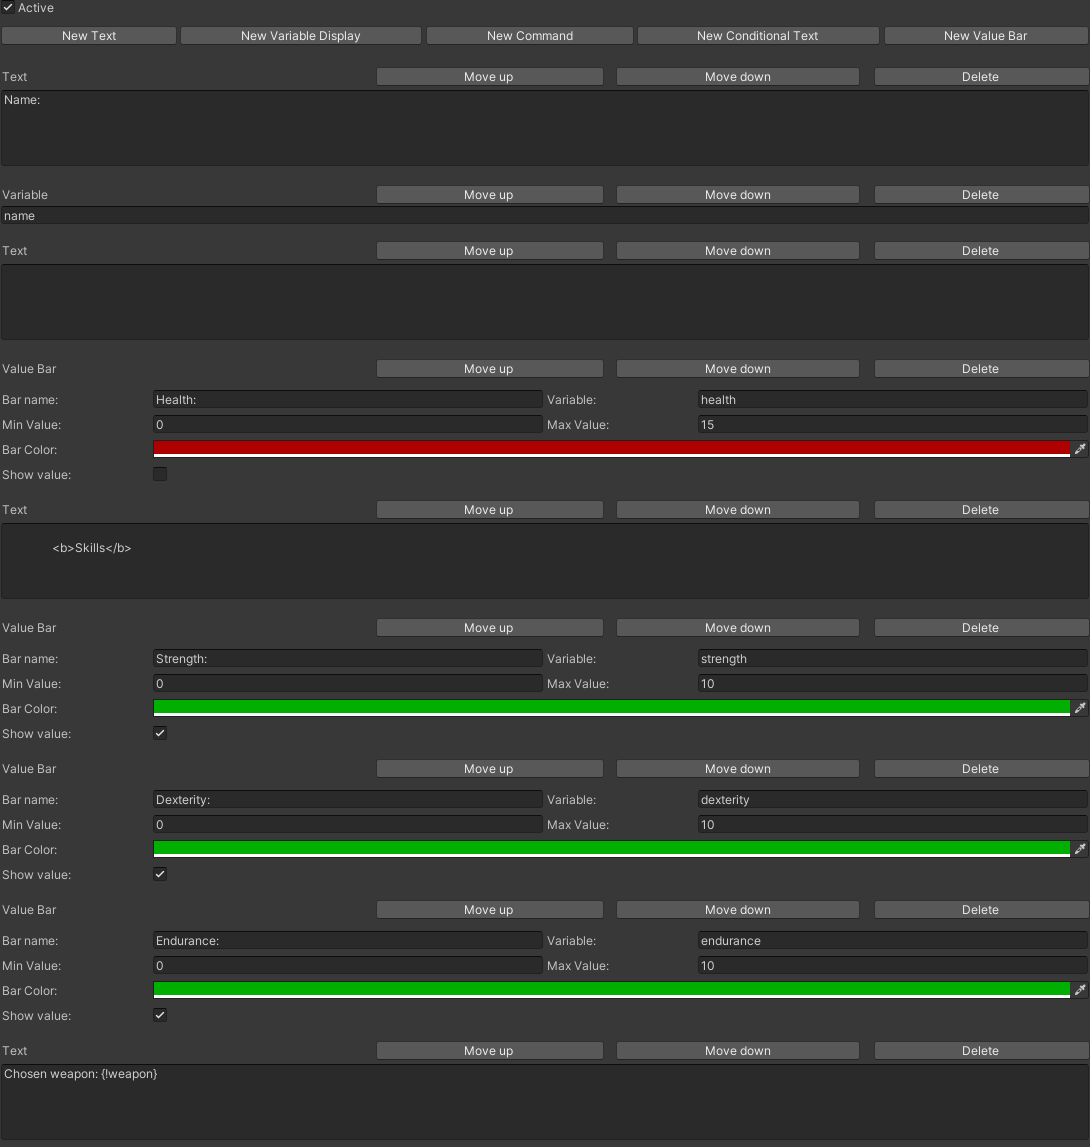
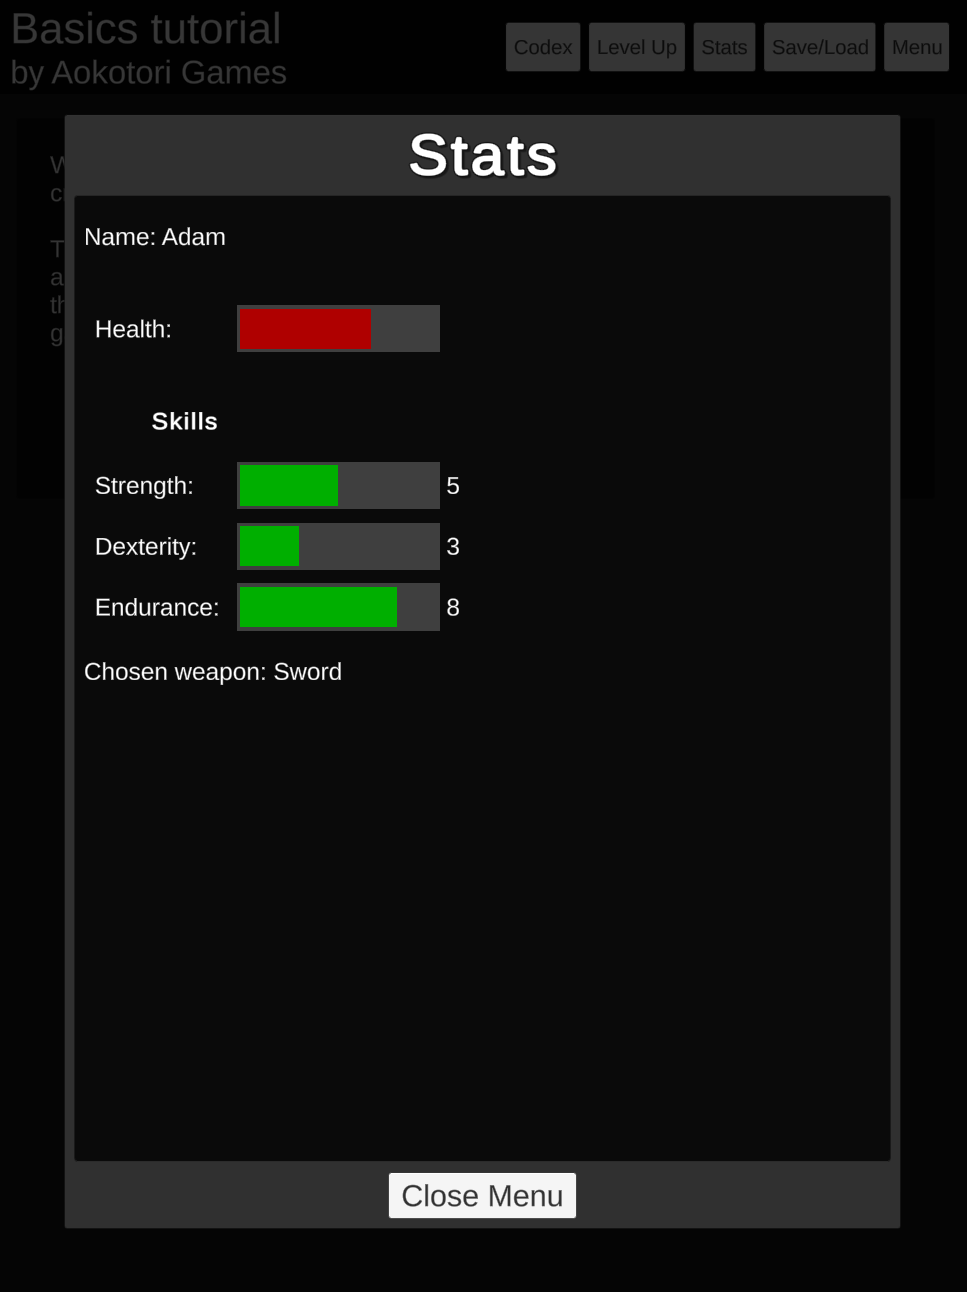
The Stats Screen Manager tab allows you to build a dedicated screen for displaying thing like character information, attributes, personality values and whatever else you could wish for. The process of building the screen is largely the same as building a normal page. You can even write commands that will execute upon opening the screen. One feature separating a stat screen from a normal page is a special bar module that allows you to represent certain number variables as a progressing bar instead of flat text. This bar can be customized by setting a minimum and maximum value, as well as the bar's color. Note that any values outside the defined scope will not cause the bar to overflow and instead remain cut off at the max value.
The created screen can be viewed at any time by pressing the "Stats" button in the top menu bar of your game screen provided the module is enabled by checking the toggle at the top of the editor window. An example stat screen can look like this:
- Level Up Module

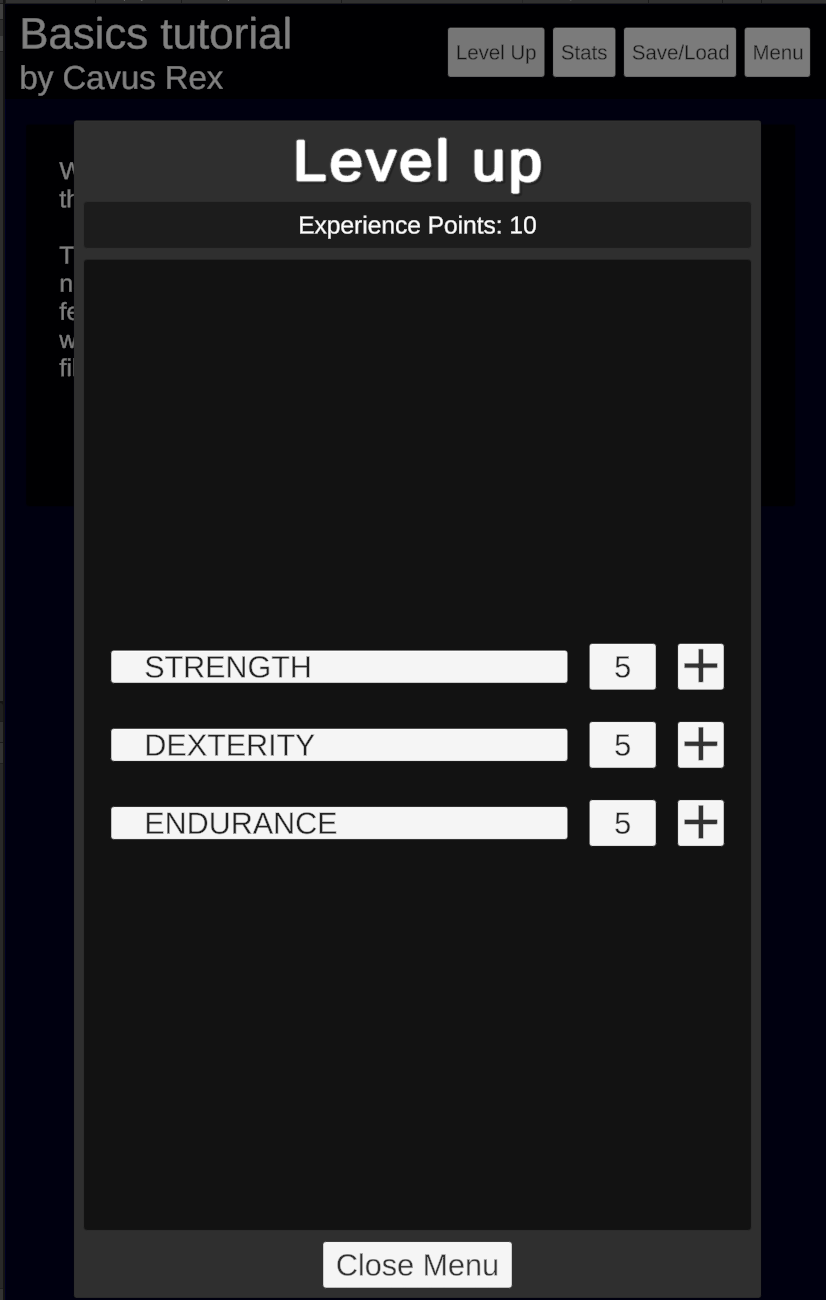
The level up framework allows you to quickly add an easy to use level up system for your game. To make the system function all you need is a dedicated variable for experience points (XP) and some stats to level up. First use the list of variables at the top to select your XP variable and optionally set a maximum value a stat can reach by leveling it up (leaving this field at 0 will allow people to level infinitely). After that you can add a few fields with the button below and select which variables should be made part of the module. That's all, now players can at any time go into a dedicated level up screen and spend their experience to increase stats as they wish, just remember to award them with points to spend by adding to your XP variable every once in a while. A fully functional level up window looks like this:
- Save/Load manager
This tab is where you can set how many manual save slots are available in your game. Setting the number to 0 will limit the game to autosaves only.
- Codex module
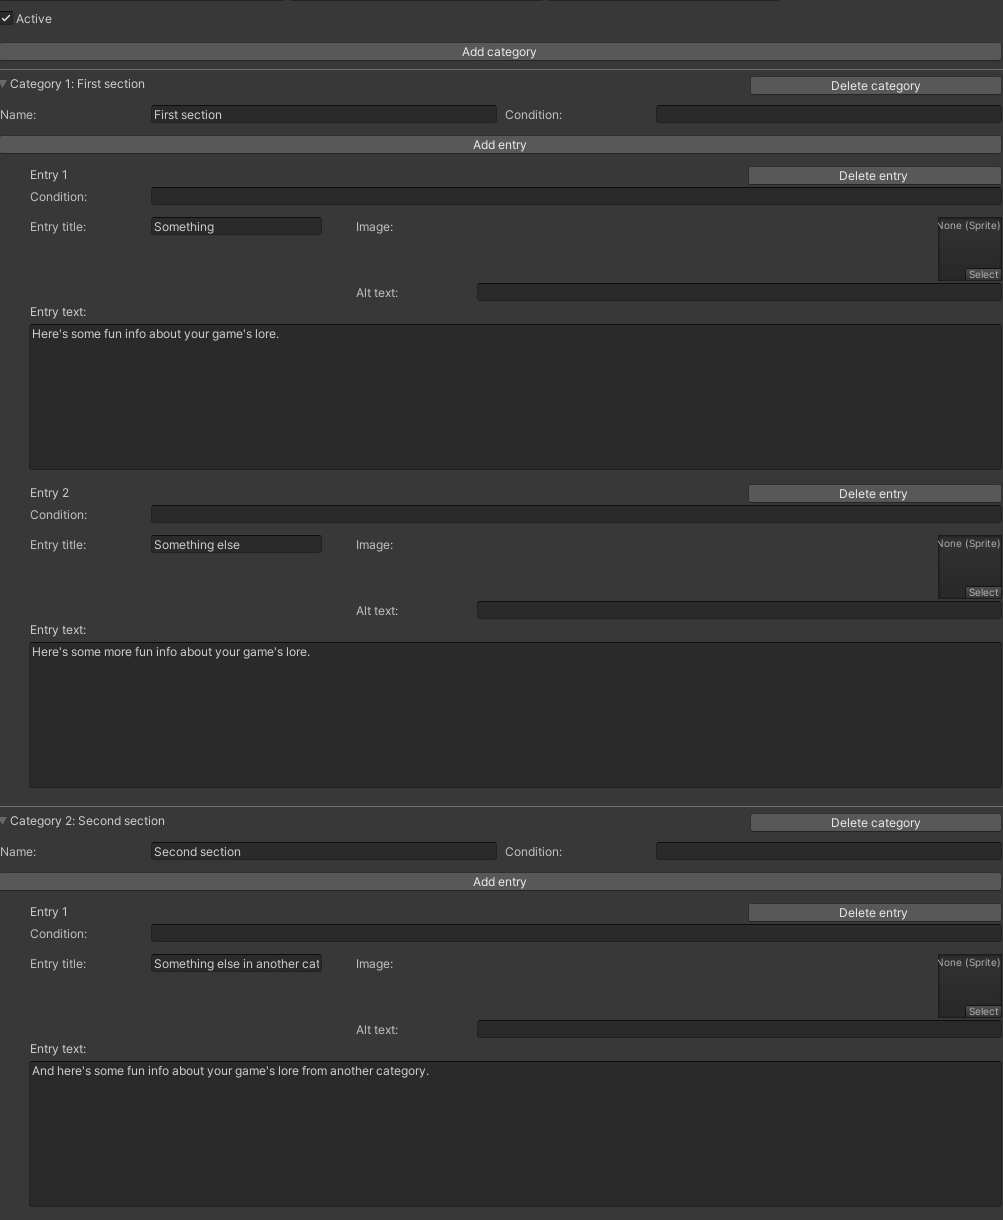
In this tab you can build your own codex where players will have access to an organized collection of entries about lore, mechanics or anything else you wish to provide them with. To build your own codex you only need to add and name the desired categories and then fill them in with entries of your choice. To each entry you can add an image that will be scaled to fit the window's width and displayed at the top of its entry. Additionally you can conditionally hide entries or even entire sections based on your in-game variables. These conditions are written using the same syntax as everywhere else.
Advanced features
Text formatting
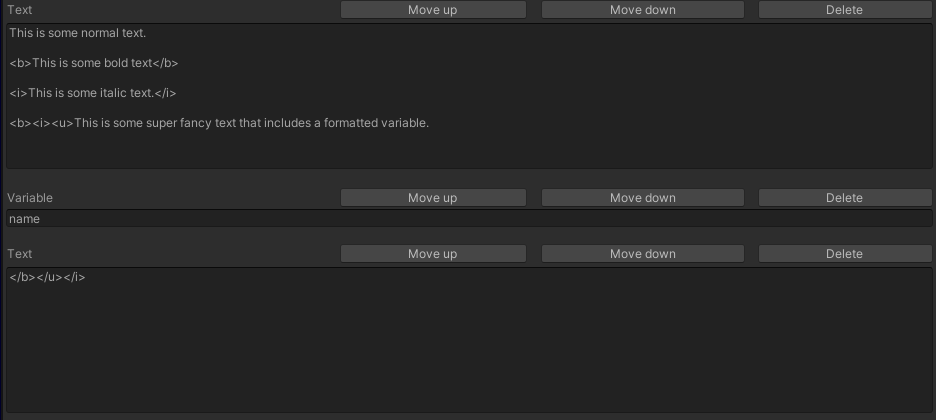
You can perform extra text formatting on parts of your text like making certain words bold or italic by placing them inside a HTML style inline block like <b>Your text</b>. You can use multiple blocks at once to make your text extra fancy.
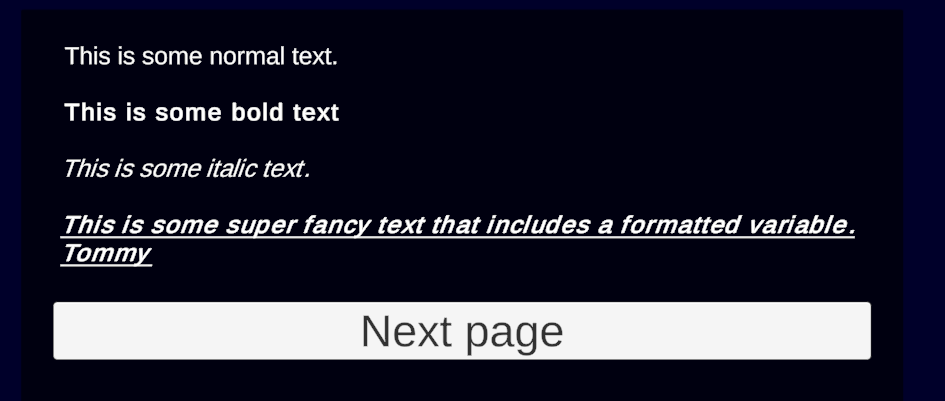
Text links
You can add special links into your page by using the <link> tag. Those links can point to external websites, or codex entries inside your game. To direct a user towards a website you need to put in the desired website as a keyword to the tag including the http/https prefix. Opening codex entries can be done by writing in Codex:X:Y instead where X is category ID while Y refers to an entry inside that category. Desired entry will be opened even if the condition for visibility inside the codex screen is not met. All links are automatically styled to be visible and indicate where they lead. Blue links lead to the web while green ones are codex entries. This styling can't be disabled for security reasons.

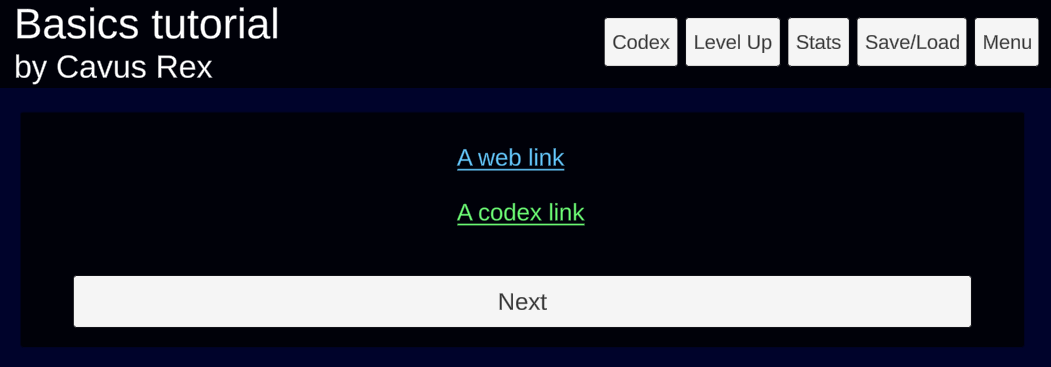
Expanded commands
Number variables can be edited in a multitude of ways by using commands. It is possible to add to a variable, subtract from it and all other basic operation by placing an appropriate operator in place of the equality symbol (=). Possible operators are add (+), subtract (-), multiply (*), divide (/) and modulo (%). It is also possible to set number variables to results of formulas by using brackets and writing a formula into the command.
For example: health = (constitution + 10)
Advanced conditions
It is possible to include more than one condition for the block. To do this you will need to use either the AND operator (&) or the OR operator (|) and write your next condition after it. Brackets are reserved for mathematical operations and won't work for combining conditions. Instead conditions are checked in reverse order from last to first. You can insert mathematical formulas into the condition by placing them in brackets. You can also check for which choice was selected in order to enter the page. To do this simply type in "choice = {ID of choice made}". Choice IDs start from 1 and are counted top to bottom.
For example: health < (healthMax / 4)
Math
It's possible to insert mathematical formulas into both commands and conditions. For a statement to be read as a formula it needs to be places in brackets (). It's possible to operate on two number variables, a variable and a number and on two numbers. It's possible to create more advanced formulas by nesting more brackets inside the opened statement. It is important to make sure that all opening brackets have a corresponding closing bracket to avoid errors.
Example of a nested formula: (health + (constitution/10))
Random numbers and rounding
Method rand:X allows you to generate a random number from 0 to X. You can implement this method into an existing equation by inserting it into a syntax wherever you need. Random does not take other number type variables as X. You can assign the result to a variable by using the method in a command field.
For example: health - (rand:3 + 1) will reduce health by a random number between 1 and 4.
Methods round:X, roundD:X and roundU:X allow you to round, round down and round up a number respectively. You can implement this method into an existing equation or use an equation as X as long as all brackets are closed correctly. Number type variables can be used as X.
For example: roundU: (health - (damage / 3)
You can also assign the result of rounding a variable into that variable by using the method in a command field.
For example: health = roundD:health
Note: All text based commands and conditions skip spaces during compilation so they can be used to help format the statement and make it more readable if necessary.
Testing Suite
To make the process of looking for bugs easier you can make use of the testing suite contained in its own window as part of Songbird. This suite will execute all blocks of code you created be it commands, math formulas, if statements or just displaying variables, collect any errors it stumbles upon and display them along with where it found them so that you can quickly find and correct them. The 2 modes of operation allow for testing the entire game at once, or just a single scene of choice by selecting it while in Scene Test mode.
Custom functions
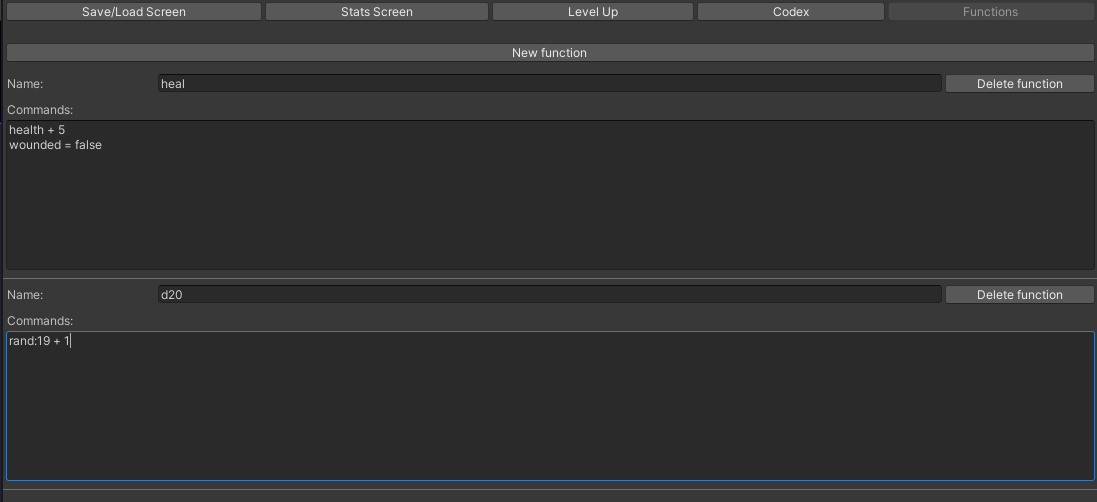
In order to streamline making your game and avoid copy pasting the same commands or math formulas in your game you can create a function to call whenever you need that particular bit of code. Functions can contain either a set of commands to execute or a formula to inject into a command. To call on a function simply preface the function name with a $ symbol in the command box. A function can only work as either a set of commands or a formula and using them outside their predefined scope will result in a failure to execute. Mathematical functions can also be used as part of conditions if they're contained within a bracket marking them as a math formula. Functions called this way can function on their own or be part of a larger formula.
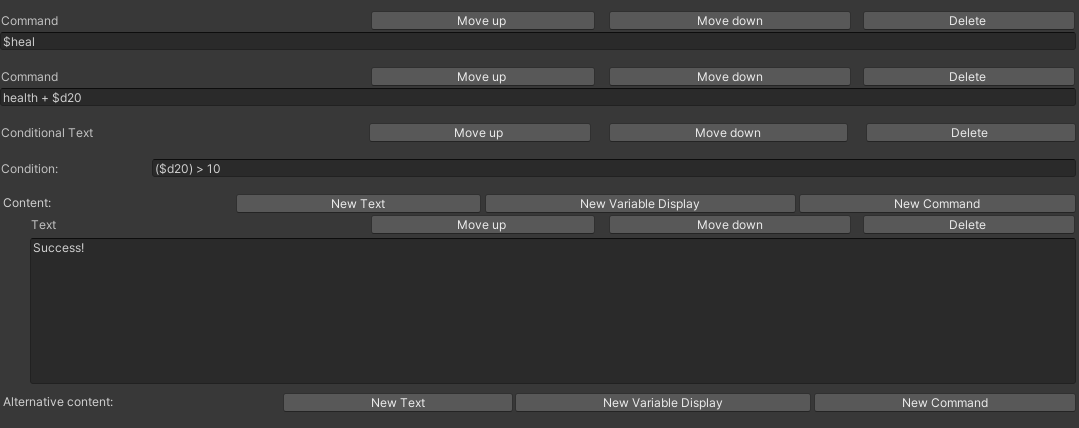
This concludes the basic functionality guide for Songbird. If you have any questions or encounter errors feel free to mention them below. This guide will be edited over time to accommodate updates and received feedback.